Crop Production

Table of Contents
- Introduction – Ayanava Majumdar 3
- About AIDB – Rachel Chastain 4
- Grow Your Own Food – Chip East 5
- Tomato Planting Basics – Chip East 6
- Squash Production Basics – Chip East 8
- Vertical Gardening – Chip East 10
- Looking for Bugs in Your Crops – Ayanava Majumdar 11
- Making Accessible Gardens – Debra Stickley, Rachel Chastain 12
- Farm-to-Table: Enjoying Local Foods – Jayme Oates 15
- Accessibility and Accommodations in Media – Harli Willis 16
- Appendix: Resource List for Ag Teachers – Ayanava Majumdar 18
Introduction
 Welcome to the First Edition of the AIDB Crop Production Handbook, an excellent team product after a year’s partnership between the Alabama Institute for the Deaf and Blind (AIDB) and the Alabama Cooperative Extension System (ACES). Over 11 hours of deliberations, needs assessment, data analysis and interpretation, and groundwork for developing the accessible garden at the AIDB led to this handbook that we hope inspires you, the reader, as well! The primary motivation for this handbook came from a quick meeting with AIDB ag teacher Rachel Chastain who takes great care in teaching her students at AIDB. During this project, we also met Matt Armbrester and Zack Burke, two of the field’s finest ag teachers, who contributed heavily to the material presented and garden development. We were also inspired by the hands-on guidance from Jayme Oates of Farmscape Solutions, which is truly transformative. Chip East and Jessie Rowan, Regional Extension Agents, brought many unique skills ranging from specialty crop production to marketing critical to 21st-century agriculture. Together this team of educators developed this handbook as a guide for teachers.
The topics in this book were developed after a detailed survey of ag teachers (17 respondents) that gave us the critical feedback we needed. We also encourage teachers to utilize the Farming Basics Phone App, which has a vast library of crops and pests, a direct contact number
for Extension personnel, YouTube videos and social media links, and other farming tools that complement this handbook. The SOW app from ACES is another valuable tool for planning a garden. We know students are thrilled when they can be engaged in multiple sensory modalities. Like most scholarly publications, this is a work in progress; it will go through changes as teachers’ needs shift. This team has started a journey, and we will have many more adventures!
Finally, we express our deepest gratitude to the Alabama Council on Developmental Disabilities for the grant ADMH-G1-4774-51 that supported this endeavor.
Ayanava Majumdar, State Leader for Program Evaluation, Entomology & Plant Pathology, Alabama Cooperative Extension System, Auburn University
About Alabama Institute for the Deaf and Blind
The Alabama Institute for Deaf and Blind (AIDB) is the world’s most comprehensive education, rehabilitation, and service program serving individuals of all ages who are deaf, blind, deafblind, and multi-disabled. Founded in 1858 by a young medical doctor who wanted to educate his deaf brother, AIDB now serves more than 36,000 infants, toddlers, children, adults, and seniors with hearing and vision loss throughout Alabama annually. In Talladega, AIDB has six campuses:
- Alabama School for the Deaf
- Alabama School for the Blind
- Alabama Industries for the Blind
- Helen Keller School
- E.H. Gentry Facility
- Marianna Greene Henry (MGH) Special Equestrian Arena
AIDB also has ten regional centers in Birmingham, Decatur, Dothan, Huntsville, Mobile, Montgomery, Opelika, Shoals, Talladega, and Tuscaloosa, extending the program offerings throughout the state. AIDB opened, with a generous endowment from a community member, the Joe Tom Armbrester Agricultural Center (JTA), in 2019. The JTA currently consists of a barn with a small teaching kitchen, raised bed and plasticulture gardening, bees, and livestock. The JTA has about 30 acres of cleared land, and we are working to improve the pastures and add orchards and a fishing pond with an environmental learning area. Our students have experienced building a farm from the ground up.
The farm site was chosen based on location and accessibility to our Talladega campuses. The land was formerly used for pine production. There have been challenges with soil fertility, but it has offered a real-life, hands-on opportunity to learn how to increase and maintain soil health.
We want to share some ideas that we are in the process of implementing to make our gardens more accessible for all of our students. We understand that accessibility will need to change as our student caseload changes. It will never be “finished,” but agriculture is never “finished.” These are recommendations for students and adults who are low vision or blind and are cane or non-cane users to navigate the outdoor area of this facility using their residual vision, white cane, or other senses safely and confidently.
Rachel Chastain, Ag Teacher, Alabama Institute for the Deaf and Blind
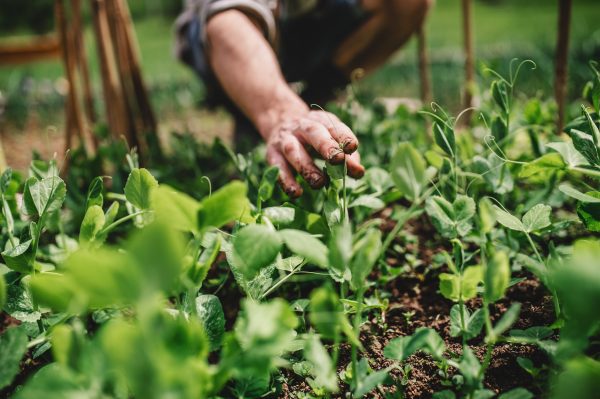
Grow Your Own Food
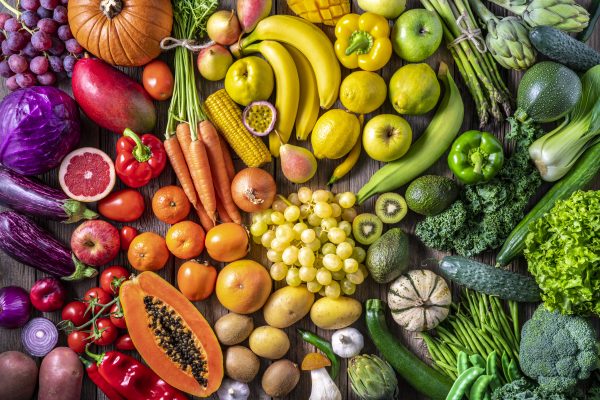 Before planting a garden, choose a site with well- drained soil, good airflow and drainage in the full sun, and plenty of access to water. Soil testing before planting ensures the pH (acidity/alkalinity levels) is in the recommended range. The soil test will also tell you what elements are needed at planting and later in the season. This has a direct bearing on crops you can or cannot grow!
Next, list some of the vegetable crops you plan to grow. Because some crops have more diseases and insects than others, you should become familiar with the common pests found on the crops before planting. Some pests can be avoided by planting disease-resistant seeds.
Use our planting guide on our website at aces.edu to find the recommended planting dates for cool- and warm-season crops. Many crops with large seeds, such as corn, peas, beans, squash, and melons, can be direct sown, but smaller seeds, such as tomato, pepper, and eggplant, are usually planted in small containers and transplanted in the garden. It is common for gardeners to grow the larger seeded crops as transplants to get an early start on production.
Mulching keeps the soil cool, keeps the soil from drying out, and helps prevent weeds. Since mulches keep the soil cool, it is recommended not to add mulch until the ground warms later in the spring. Some growers use black plastic mulch, which helps the soil warm in the spring. Organic mulches can be excellent for the garden; examples include pine bark, pine straw, and wheat straw. Organic mulches also add nutrients to the soil and increase the soil’s water- and air-holding capacity as they break down.
Plants will need to be irrigated for the best production. The plants can be watered by hand at plant bases, but we recommend drip irrigation or other water management methods. Overhead irrigation that wets the leaves encourages disease issues under our weather conditions and should be avoided.
Cover crops are recommended if you can plant them and turn them under in the garden. Composting yard waste is a good way of getting organic matter for the garden. Additional cover crops and composting information can be found on our website or by contacting your county Extension office.
Chip East, Regional Extension Agent, Commercial Horticulture, Alabama Cooperative Extension System
Tomato Planting Basics
 Before planting tomatoes, you must choose a site with well-drained soil, full sun, good air movement, and access to irrigation water. Soil testing before planting ensures the pH (soil acidity or alkalinity) is in the recommended range for best plant growth.
While direct seeding is common for many crops, using tomato transplants grown separately in the garden is more common for tomatoes. Transplants can be purchased from nurseries and garden centers, or gardeners may grow their transplants. Several factors influence the growth rate of tomato transplants, but quality transplants could be produced in about five to six weeks. Therefore, tomato seeds should be planted about 5 weeks before transplanting into the garden.
The root ball of short transplants with larger stems can easily stand up without being broken by the wind and can be planted at ground level. If tall transplants with narrow stems are used, they should be trenched.
Trenching a tomato plant involves digging a trench, laying the seedling in the trench, covering the roots and most of the stem with soil, and leaving the top 3 inches of the plant sticking out of the ground.
Mulching keeps the soil cool, keeps the soil from drying out, and helps prevent weeds. Since mulches keep the soil cool, it is recommended not to add mulch until the ground warms later in the spring. Some growers use black plastic mulch, which helps the soil warm in the spring. Organic mulches such as pine bark, pine straw, and wheat straw can be excellent in the garden. Organic mulches will add nutrients to the soil and increase the soil’s water and air-holding capacity as they break down.
Tomatoes need to be supported to grow upright. It is common on a small scale to use tomato cages, and larger growers will use stakes and string. Remember to stake the cages so they will not fall over with the weight of the plant and fruit.
Plants will need to be irrigated for the best production. The plants can be watered by hand, or an irrigation drip line can be used if many plants are growing. Overhead irrigation is not recommended as it wets the leaves and encourages disease.
Scout and manage diseases and insects, rotate the crop to another location in the garden yearly, control weeds, plant cover crops when possible, and manage the nutrients. A soil test helps a grower know what nutrients need to be added to the soil. Contact your county Extension office for more information on tomato production.
Chip East, Regional Extension Agent, Commercial Horticulture, Alabama Cooperative Extension System
Squash Production Basics
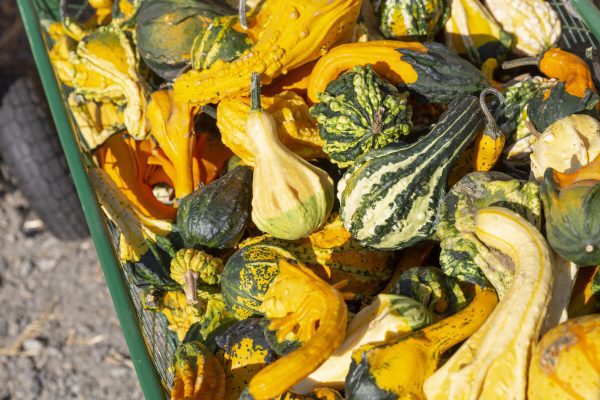 Before planting squash, you must choose a site with well-drained soil, full sun, good air movement, and access to water. Soil testing before planting ensures the pH is in the recommended range and allows you to know what nutrients will be needed at planting.
Squash can be direct-seeded or transplanted from containers after the danger of frost has passed. Squash will produce fruit in about 40 to 50 days. Rows spaced 4 to 6 feet apart with plants spaced 2 to 2 1⁄2 feet apart in the row are common for growers. If protected from disease and insects, squash plants can produce for a long time, but the best production is usually from younger plants. Therefore, growers will usually plant squash several times during the growing season.
High-quality, productive squash can be grown with crook neck or straight neck varieties. Several viruses are found in squash; virus-resistant or tolerant varieties should be planted. If you are interested in recommended squash varieties, call your county Extension office.
Squash plants produce male and female flowers. Bees need to move pollen from the male bloom to the female flower. Squash has insect pests that must be managed as well. Read and follow label directions of any pesticides that are used. Pay attention to the Environmental Hazards section on the label where injury to bees is discussed. Some insecticide labels will state that this product is highly toxic to bees exposed to direct sprays. If this is the case, spraying early in the morning or late in the evening is recommended. Of those two choices, late evening or even at night is recommended.
Mulching keeps the soil cool, keeps the soil from drying out, and helps prevent weeds. Since mulches keep the soil cool, it is recommended not to add mulch until the ground warms later in the spring. Some growers use black plastic mulch, which helps the soil warm in the spring. Organic mulches such as pine bark, pine straw, and wheat straw can be excellent in the garden. Organic mulches add nutrients to the soil and increase the soil’s water and air-holding capacity as they break down.
Plants need to be irrigated for best production. The plants can be watered by hand, or an irrigation drip line can be used if many plants are growing. Overhead irrigation is not recommended as it wets the leaves and encourages disease.
Scout and manage diseases and insects, rotate the crop to another location in the garden yearly, control weeds, plant cover crops when possible, and manage the nutrients. A soil test helps a grower know what nutrients need to be added to the soil. Contact your county Extension office for more information on squash production.
Chip East, Regional Extension Agent, Commercial Horticulture, Alabama Cooperative Extension System
Vertical Gardening
 Vertical gardening is usually practiced using hydroponics and can be a space saver in a small area. An upright structure supports the plants in a vertical gardening system, and nutrients are delivered to the plants through the irrigation system. More plants can be grown per square foot of floor space in a system such as this, but it takes management. Hydroponic systems involve the plants being set out in a soilless media, such as perlite, peat moss, pine bark, or even water. Vertical gardening systems can be homemade or purchased. Sunlight can be an issue. To solve this problem, the structure can be turned periodically, or supplemental light can be added. In a vertical system, irrigation water does not need to drip on the plants positioned below, which would encourage disease.
Chip East, Regional Extension Agent, Commercial Horticulture, Alabama Cooperative Extension System
Looking for Bugs in Your Crops
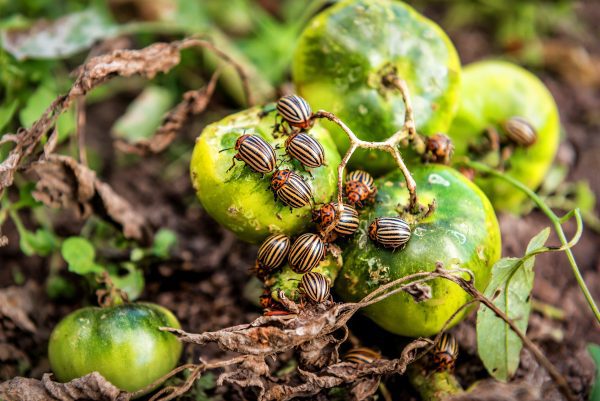 No matter where you farm or garden, you will likely find insects! Insects are arthropods with jointed legs that hide very well. Insects have a significant ecological role but can become pests when they compete with humans for the same crops. Always identify insect pests correctly so you don’t kill beneficial insects and pollinators. Use the Farming Basics mobile app and other resources from Alabama Extension for simple, fun ways to find what’s bugging you.
An insect scouting kit should include a magnifying glass to see small insects, a plastic jar or sandwich bag for collecting insects, tweezers for collecting, a sweep net for catching flying insects, a camera or phone for pictures, a white paint pan to gather insects that fall off plants, and a trowel to dig around plants.
How and Where to Look for Insects
- Some insects, such as stink bugs and caterpillars, like the high humidity and protection provided in the thick canopy. Shake the plants to dislodge insects or open the plant canopy to look for insects.
- Some insects lay eggs on the top of plants. For example, armyworms lay eggs on the underside of leaves in bunches with hair glued onto the mass. Clip those leaves or destroy the egg mass to prevent an outbreak.
- Use the sweep net to rapidly collect insects from short crop or field edges to see what insects are active.
- Some small insects, such as aphids and whiteflies, hide well on the underside of leaves. You may need to turn over the leaves and use a magnifying lens to see them or shake the leaves inside a sandwich bag to collect insects that fall off.
- Some insects live in the soil and damage plants at the soil level. You may have to dig shallowly around the plant base or under plant debris to find them.
Ayanava Majumdar, State Leader for Program Evaluation, Entomology & Plant Pathology, Alabama Cooperative Extension System, Auburn University
Accessible Gardens
 This section shares some experiences and challenges as we developed the AIDB vegetable garden as a hands-on teaching location for AIDB students. This list is incomplete; this is a growing body of experience as we continue working with students.
Parking
Ask yourself: Can a full-size bus enter and exit your garden parking lot?
- Even smaller classes often have to take a full-size bus because of meeting the need for how many wheelchair slots are available.
- Is the parking lot level enough that the wheelchair lift can safely unload and load passengers?
Walking Paths
A paved, level, and smooth terrain for the sidewalks, driveways, and walkways are essential to prevent tripping and falls. If there are holes, dips, or uneven cracks, people with low vision or people who use canes can misstep, possibly causing them to fall.
Seating
- Add moveable seating in the garden area for students who require frequent rest stops.
- Seating also allows a great place to stop for a lesson.
- Portable garden kneelers can also be made available to students.
- Other ideas include picnic tables, patio furniture, and simple benches of varying heights.
Sidewalks
Concrete sidewalks are the best way to make paths to the garden accessible. The federal guideline for accessible sidewalks is 36 inches wide.
- Consider making the sidewalk double or triple the federal requirement.
- Wide sidewalks will allow groups of children to have a place to stop but enable others to move around them.
- Sidewalks with flush-colored brick borders are helpful to visually impaired students in defining space. The colored border bricks can also be textured. This helps people who use canes find the boundary. The border being flush is important because you want to avoid creating a tripping hazard.
- Keep sidewalks clear of hoses, tools, and carts.
- Alert guests when the garden layout has changed.
Stairs
- Plan a garden without steps or stairs. If your garden must have stairs, paint the stairs a different color to call attention.
Raised Beds
- Use vertical bookcase-type planters to allow maximum accessibility and visibility.
- Choose raised beds with varying heights (17 and 32 inches tall).
- Install raised beds that are long, narrow, and easy to reach into or across. Consider the contrast between the raised bed and the border.
Contrasting Colors & Textures
Contrasting colors are needed to locate different areas or objects and to maintain or regain orientation.
- For example, the contrasting color of the gray sidewalk next to the green grass can help the traveler stay safely on the level and smooth terrain of the sidewalk.
- Adding permanent-colored tactile pavers along the edges of the sidewalks for people with low vision to see the color difference and feel the texture change under their feet assists them in staying in the parameter of the level sidewalk.
- People who use canes can differentiate between the textures to identify the sidewalk, the tactile pavers, and the grass. These visual and tactile differences enable the person with low vision or people who use canes to follow a straight line of travel or identify breaks between raised beds to get to a specific destination.
- Some contrasting colors to consider are yellow, and red or black and white, which stand out when placed next to each other.
Destinations
- Using bright contrasting colors as a border for the raised beds will help the person with low vision to differentiate between raised beds.
- Marking a destination with a large and movable object helps people with low vision or people who use canes to independently travel to their location.
- Colorful spinners, windsocks that move, wind chimes, or orange construction cones are some examples of portable objects that can be placed along the edges of the raised bed and moved from location to location when needed. These can be used as a visual orientation clue, while colorful wind chimes can be used both as visual and auditory.
Nonoptical Devices
- Since placing a covering over the raised beds is not practical for growing plants, having a supply of reusable sunglasses or eye shades that can be cleaned should be available for students who have photophobia (abnormal sensitivity to light) or have problems with glare from the bright sun.
- Usually, the students should bring their hat and sunglasses or eyeshades, but have a supply of sunglasses or eyeshades to offer in case they do not.
Tools
- Offer ergonomic hand tools to students.
- Make sure some of your tools are lightweight for all strengths.
- Regularly check wooden handle tools for splinters. Use medical tape as a wrap on tool handles, if needed.
Debra Stickley, Orientation and Mobility Specialist, Alabama Institute for the Deaf and Blind
Rachel Chastain, Ag Teacher, Alabama Institute for the Deaf and Blind
Farm-to-Table for Enjoying Local Foods
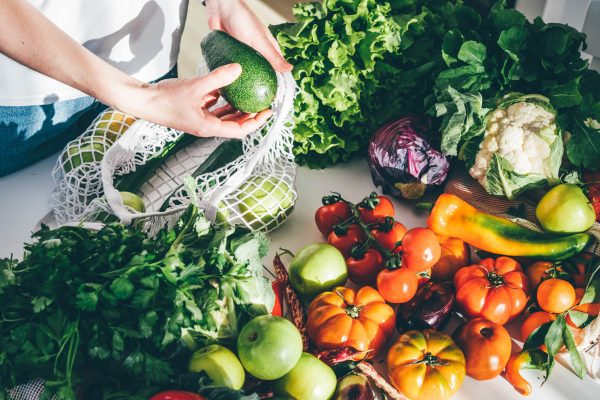 When you buy food from a local farmer or eat at a restaurant that buys from local farmers, you are part of what is called farm-to-table that involves eating locally grown produce that is in season, or available at certain times during the year.
Why Is It Important?
How the foods people eat are produced significantly affects their bodies, the landscape, and the communities in which they are produced. Here are several considerations when purchasing groceries:
- Most of the produce available at grocery stores were harvested weeks before you buy it and traveled thousands of miles to reach your plate.
- Buying direct from a local farmer is a direct investment in your own community.
- Most people eat at least once a day. Making sure you have a local farm to provide produce is a form of food security, ensuring you have food readily available regardless of grocery store supply chains.
- Decreasing the miles you or your produce trav- el to arrive on your plate saves time, money, and fuel.
- Supporting local organic farms supports clean air, water, soil, and food.
DIY
Growing some of your own food can be good for your body and your bank account. It is an investment in your health and well-being, and it’s one of the most satisfying and empowering feeling to eat something you grew yourself.
- Plant seeds in a flower pot or any repurposed container with a drainage hole suitable for the plants and soil.
- Place the pot in your yard, on the door stoop, or even in a window that gets sufficient light.
- Water and fertilize as needed until harvest.
- Prepare a fantastic meal incorporating your home-grown ingredients.
- Share with your family and friends!
Jayme Oates, Farmscape Solutions
Accessibility & Accommodations in Media
 Accessibility and accommodations can be overlooked in content creation, especially in media. People of all abilities take in media, and it is our responsibility as video producers, writers, online educators, and anyone creating something digital to consider accommodations for all to access their works. Physical, visual, speech, auditory, neurological, and cognitive disabilities should be considered when creating accessibility measures. The understanding of Universal Design for Learning (UDL) is an important framework that can be useful for Extension educators. UDL offers guidelines for any discipline or domain to ensure all learners can access and participate in meaningful, challenging learning opportunities (CAST Inc., 2022). UDL recommends 1.) Using multiple means of engagement that hold interest, challenge the audience to the appropriate level, and promote realistic expectations; 2.) Provide various means of representation of information with appropriate language, symbols, and background knowledge that improves comprehension; 3.) Provide multiple means of action and expression with access to tools and assistive technologies, various media for communication, and support for all learners. Below is a quick checklist/recommendation for making media accessible. Be creative in formulating your strategy and goals.
Do you have distinctive colors for your website and any imagery?
Color is not perceived by everyone the same An individual might not perceive some content based on color alone or be able to distinguish text from its background without enough contrast. Color should not be used as the only indicator of a page or document feature. Use heavily contrasting colors or a secondary indicator to convey the same meaning.
Have you provided alternative text for all images or a full transcript for all videos?
Alternative text and video transcripts are invisible descriptions read by assistive technology, explaining an image or video for an individual who is unable to see it. If it is not included, assistive technology will simply read an image as “image” or a video as “video.”
Have you included a space for captions in all video or audio files?
Captions are real-time words comparable to the noises in a video or audio clip for people who are unable to hear it. When creating captions, include background noises and ambient sounds. Ensure accurate timing and speed that can be read by viewers. Do not have captions block any important visual content, cut off on the edge of the screen or overlap with other captions.
Have you used clear headings and subheadings for different sections of a website, page, video, or article?
Headings and subheadings bring structure to a page. Clear headings will allow someone with assistive technology, such as a screen reader, to easily navigate through an article or page. Use the Color Contrast Accessibility Validator for web content.
Have you only used legible fonts?
Fonts are typically chosen based on aesthetics but can be challenging to read for some individuals with poor or failing vision or those with reading disabilities. All fonts should be large and designed for easier reading.
Have you made all tables and charts easy to navigate when being read aloud?
A table or chart hosts information breakdowns but acts as an image or scrambler to some assistive technology. It is typically read from left to right and top to bottom, but some screen readers take it word by word. Do not use split or merged cells, use clear row headings through settings, and, most importantly, provide alternative text to the chart or table.
Have you clearly marked all accessibility accommodations and made them easy to find and use?
Just as you scroll through a page looking for the settings cog image, a phone number, or specific headings, ensure all accessibility accommodations are clearly directed to and marked for individuals who could have issues finding accommodations. The accommodations should be usable immediately, not as a last resort. Providing easy-to-find accommodations make for a much more pleasurable experience.
Have you put a policy in place to make a standard for content creation in your group or department?
Accessibility should not be something you are known for or are doing among a group of people with the same goals. Make it uniform among your company, department, or even group. Once people know your organization or group takes accessibility seriously, you can expand and make your audience more loyal.
For Further Reading
- Center for Applied Special Technology (CAST, Inc, Wakefield, MA). 2022. Universal Design for Learning Guidelines. https://udlguidelines.cast.org/
- Burgstahler, S. 2020. 20 Tips for teaching an accessible online course. University of Washington DO-IT AccessCyberlearning Project. https://www.washington.edu/doit/sites/default/ files/atoms/files/20_Tips_Designing_Cours- es_5_7_20.pdf
- How to make digital assets accessible: Univer- sal Design (UD). Center for Academic Technology, Butler University. https://libguides.butler. edu/accessibility/universaldesign
- Color Contrast Accessibility Validator, Web Content Accessibility Guidelines (WCAG) 2.1. Bureau of Internet Accessibility. https://color. a11y.com/?boia
Harli Willis, Program Assistant, Alabama Cooperative Extension System
Ayanava Majumdar, State Leader for Program Evaluation, Entomology & Plant Pathology, Alabama Cooperative Extension System, Auburn University
ACES Resource List for Ag Teachers
Social Media & Digital Resources
- ‘Where to Start’ Blog article for beginning farmers: https://www.aces.edu/go/2754
- Digital Archive of Hybrid Educational Events (webinars/virtual farm tours): https://www.aces.edu/blog/topics/crop-production/digital-resources-for-farmers/
- Signup here to get year-round CROP/PEST ALERTS (Alabama IPM/Sustainable AG E-newsletter).
- Farming Basics Online Course (4 CEUs for ag professionals): https://aces.catalog.auburn.edu/courses/acesfarmingbasics01
- Certification and Regulations for Small Fruit Producers Online Course: https://aces.catalog.auburn.edu/courses/small-fruit-producers
- Alabama Beef Basics Online Course: https://aces.catalog.auburn.edu/courses/acesbeefbasic01
- Alabama Forage Basics Online Course: https://aces.catalog.auburn.edu/courses/forage-basics
- Social Media Channels (Facebook):
- Alabama Extension Commercial Horticulture Team
- Alabama Vegetable IPM
- Alabama Farmer Connection
- Twitter:@AlabamaIPM
- Instagram: Farming_Basics
Alabama Extension Ag Teams with Regional Extension Agents & Specialists
- Agronomic Crops (https://www.aces.edu/go/2742)
- Animal Science and Forages (https://www.aces.edu/go/2743)
- Aquatic Resources (https://www.aces.edu/go/2744)
- Commercial Horticulture (https://www.aces.edu/go/2745)
- Farm & Agribusiness Management (https://www.aces.edu/go/2746)
- Food Safety & Quality (https://www.aces.edu/go/2747)
- Forestry, Wildlife & Natural Resources (https://www.aces.edu/go/2748)
- Home Grounds, Gardens & Home Pests (https://www.aces.edu/go/2750)
- Poultry (https://www.aces.edu/go/2753)
Diagnostic Labs for Plant & Insect Sample Identification
- Plant Diagnostic Lab – Auburn (http://offices.aces.edu/plantlabauburn/)
- Plant Diagnostic Lab–Birmingham (http://offices.aces.edu/plantlabbham/)
- Soil Testing Lab – Auburn (https://aaes.auburn.edu/soil-forage-water-testing-lab/)
Ayanava Majumdar, State Leader for Program Evaluation, Entomology & Plant Pathology; Harli Willis, Program Assistant; Chip East, Regional Extension Agent, Commercial Horticulture; and Jessie Rowan, former Regional Extension Agent, Farm and Agribusiness Management, all with Auburn University; Jayme Oates, Director, Farmscape Solutions; Rachel Chastain, Ag Teacher, Alabama Institute for the Deaf and Blind; Zachary Burke, Ag Teacher; Matt Armbrester, Ag Teacher; Debra Stickley, Orientation and Mobility Specialist, Alabama Institute for the Deaf and Blind; and Rasika Ramesh.
New May 2023, Alabama Institute for the Deaf and Blind Crop Production Handbook for Teachers, ANR-2985