Alabama 4-H
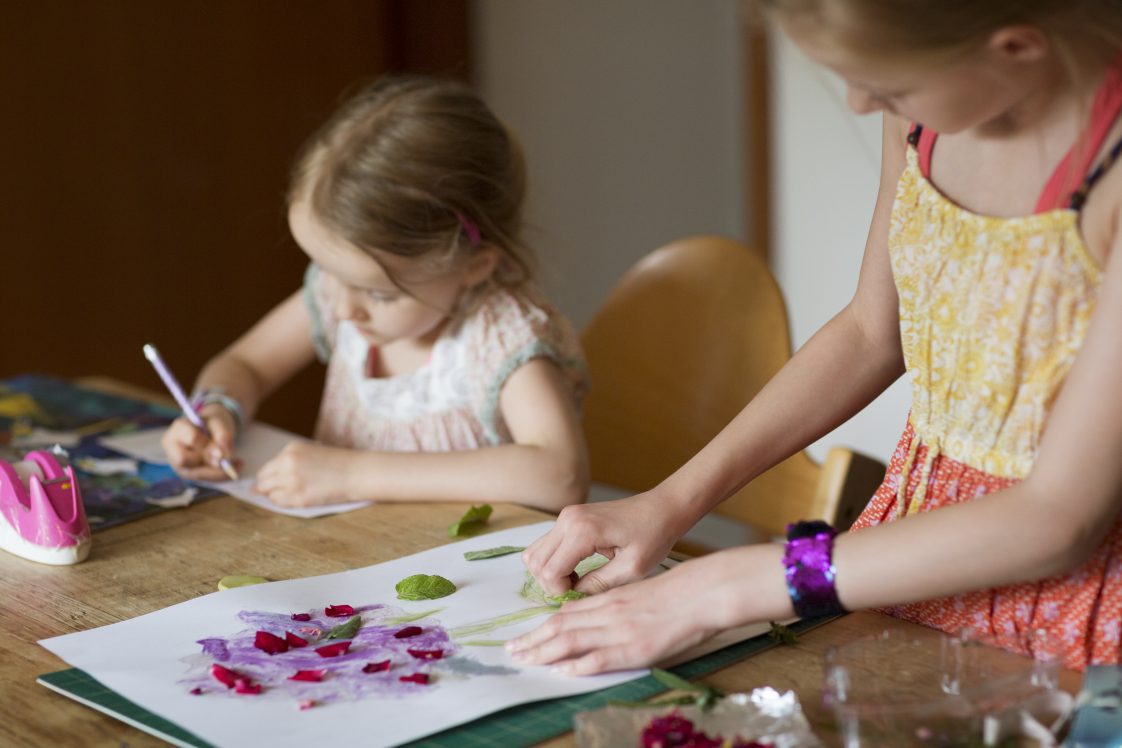
Students will learn science (biology and chemistry), visual arts, history, and environmental education in this 4-H STEM project on how to create dyes and paints using plants.
Objectives
Participants will (1) learn that plant cells contain color pigments, (2) discover that when plants are boiled in water, the cells rupture, releasing color pigments into the water, (3) examine how the color depth or brightness changes (becomes concentrated) as the water in it is allowed to evaporate due to boiling, (4) explore how the plant pigment and water can be used as a fabric dye and as watercolors, and (5) create a color wheel using the dyes and watercolors created through this process.
Background
 Throughout history, people have used natural pigments from naturally occurring substances for dyeing and painting. The three sources of these pigments include plants, animals, and minerals. Cave paintings, possibly dating back 40,000 years, contain paints made from earth minerals and charred bone. Naturally occurring pigments were the only source for dyeing and painting until the first synthetic colors were created in 1856 by English chemist William Henry Perkin.
For centuries, purple was associated with and reserved for royalty. In early times, purple was derived from a rectal gland of certain mollusk species (an aquatic organism). Thousands of them were needed to create enough dye, making it valuable and rare. Another popular dye color derived from plants is blue. This blue pigment was extracted from the leaves of the indigo plant starting around 1600 B.C.
To extract the colored pigments from flowers, vegetables, leaves, and berries, the plant parts are ground up or crushed. Once they have been processed into tiny pieces, a small amount of water is added and allowed to come to a gentle boil. The hot water (boiling) causes plant cells to rupture, releasing the cell’s plasma, which contains the colored pigment, into the water. Once you feel the color is ready or have extracted as much color as possible, you need to strain the solids from the liquid. The plant dye is now ready to be used for dying, but you will want to add alum to it so the color will chemically bond with the fabric, making the color steadfast.
If you want to use the plant pigments as a watercolor paint, you must concentrate the color by removing water through the boiling process. As you are trying to get it ready for use as a watercolor, periodically test the color using a coffee filter strip until it reaches the shade you want.
The following activities encourage participants to explore and experiment with various plants and other natural objects as they discover the vast range of colors hidden in the world around them.
Sample Plant List and Color Chart
The following is a list of plants and the colors they may create when processed, as described in the following activities. A lot of other plants and plant parts can be used as you experiment to see what color pigments are hidden within.
| Plant Material | Potential Color |
|---|---|
| Red onion (root skin) | Pink |
| Strawberries (fruit) | Pink |
| Beets (root) | Rose |
| Red cabbage (leaves) | Purple |
| Elderberries (fruit) | Purple |
| Muscadines or purple grapes (fruit) | Purple |
| Red cedar (root) | Purple |
| Blackberry (fruit) | Purple-red |
| Blueberries (fruit) | Blue-purple |
| Staghorn sumac (fruit) | Light red |
| Staghorn sumac (leaves) | Black |
| Goldenrod (flowers) | Yellow |
| Carrots (root) | Yellow |
| Yellow onion (root skin) | Yellow |
| Osage orange (wood) | Yellow |
| Marigold (flowers) | Yellow |
| Lichen (plant) | Gold |
| Wild plum (root) | Reddish brown |
| Walnut (hulls) | Brown |
| Acorns (nut) | Brown |
| Plantain (leaves) | Green |
| Spinach/collards (leaves) | Green |
Activity 1: Discovering Art Through Red Clay and Grass Stains
OVERVIEW: Every child and adult who lives in Alabama and has spent time outdoors has probably come in the house with grass or red clay stains on their clothing. This activity encourages participants to investigate the colors, both visible and hidden, that exist within the plants and other natural objects that are in the world around them.
GROUP SIZE: This activity can be done individually or in pairs.
ACTIVITY TIME: 45 to 60 minutes per session
LOCATION: Preferably outdoors: The collecting and rubbing of plant parts, soil, decayed wood, and other natural objects is best done outdoors as it can be a messy activity.
MATERIALS: One clipboard per participant or pair of participants, at least one sheet of white copy paper, and a pencil per clipboard

-
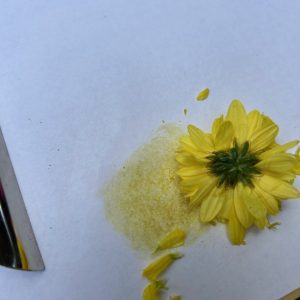
- Take an object such as this flower and press down firmly as you rub it onto the paper. This mum bloom revealed a bright yellow color.
GENERAL PREPARATION AND PROCEDURE:
1. Begin by having the participants list some of the colors they observe in the world around them, including those seen in our clothing and in art. Discuss how, in today’s world, many of these colors are created using synthetic processes involving chemicals. Ask, “Do you think there are any problems associated with synthetic colors? Where do you think people found colors for use in coloring fabrics, makeup, and artwork before synthetic colors?”
2. Instruct the group, “Today, we will go on a color discovery walk around the school grounds, park, or other areas and discover some naturally created colors and how to extract them by rubbing the object against paper.”
3. Demonstrate to the youth how to clip or remove a single flower petal or leaf as they pick a variety of plant parts. Also show them how to collect other natural objects such as red clay, rotting pieces of wood, and other objects so they can be tested for color pigments.
4. Show the participants how to rub the object in a small circle (the size of a quarter) on one side of the piece of paper to discover the hidden color within the object.
5. Have the participants continue to explore rubbing a variety of natural objects to see what colors you can find hidden in nature. Make sure you label each color with the object from which it was created.
6. Once they have identified several sources of different colors, have youth create simple pieces of artwork by rubbing plant and natural objects on a piece of paper, such as in the example below.
7. Have the participants share their creations with the rest of the group and explain what plant or object was rubbed to create the various colors found in their artwork.


EXTENSIONS:
1. Encourage the youth to experiment with various natural objects to create a color wheel with the primary colors of red, yellow, and blue and color hues that fall between them. Use the Natural Objects Color Wheel found on page 9 for this activity.
2. Explore the pounding of flowers and leaves between pieces of paper or cloth using a wood mallet or hammer. By pounding on the paper or fabric with the flower or leaf in between, the color pigments will be forced out of the plant and absorbed by the paper or cloth. The colored “stain” created by the plant’s color pigments will create an image of the original item. This process is called Cherokee Leaf Printing or an ancient Japanese technique called Tatakizome.
Activity 2: Making Dyes from Plants
OVERVIEW: Through this activity, participants will collect and “cook” a variety of plant materials as they experiment and remove color pigments from the flowers, leaves, roots, and berries they collected. Participants will use these color pigments to dye cloth.
GROUP SIZE: This activity should be done as a group since it will require adult supervision. Caution: One or more hot plates or a stovetop will be used to process the plant material in this activity.
ACTIVITY TIME: 45 to 60 minutes per session You may need to have more sessions depending on how many batches of plant materials you want to “cook” to extract the various color pigments.
LOCATION: Indoors works best but can be outdoors if an electrical hookup is available.
MATERIALS: Bags or baskets to collect plant parts; scissors or clippers for cutting plant parts; several bowls in which to place the desired plant parts; one or more hot plates or a stove with burners; saucepans (one for each burner) in which to boil the plant parts; spoons for stirring; rubber gloves; pot holders; alum; coffee filters, cheesecloth, or strainer; food blender; washed plain cotton fabric; tongs; clothesline; and spring-operated clothespins.

-

- Morning glory blooms being processed as a plant dye.

-

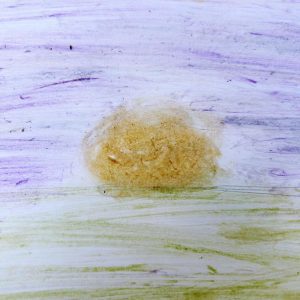
- A purple pigment collected from morning glory blooms.
GENERAL PREPARATION AND PROCEDURE:
1. Ask the youth to reflect on Activity 1 when they rubbed plant materials on paper to remove the colored pigments. Discuss how natural-colored pigments were used historically and can still be used today as a dye or watercolor.
2. Explain that they will be collecting various plant materials for this activity.
3. Begin by showing students how to collect flower petals, berries, leaves, and roots in the bags or baskets. Explain that for this activity, they must collect approximately 1 or 2 cups or more of each item from which pigments are extracted.
4. Once the plant material has been collected, instruct them on how to process it by carefully cutting and grinding or crushing it to release the pigments. Scissors can be used to cut, but a food blender or processor works great for this step. Add the plant material to about a quart of water before processing the material.
5. Take the slurry made through the processing stage and place it in the saucepan. Bring the slurry to a boil, and keep the material stirred while it is on the hot plate. Let it boil for 1 to 2 minutes to release the color pigments. (During this step, the boiling plants may give off an odor.)
6. Caution: Remove the saucepan from the burner and pour the slurry and liquid into a bowl. Set the bowl aside and allow the slurry to remain there for several minutes as the plant’s cells continue to rupture, releasing color pigments into the water. (You can clean the saucepan and process another batch of plant material while waiting for the other batch to finish releasing plant pigments.)
7. Once the slurry has rested for several minutes and started to cool, carefully pour the contents of the bowl through a strainer, coffee filter, or cheesecloth into another bowl. This will remove the plant material from the liquid. Instruct the youth to carefully press the plant material using the back of a spoon so the remaining liquid from the plant material is pressed out. You may now dispose of the plant material, keeping just the strained liquid.
8. Instruct them to add 1 tablespoon of alum per quart of liquid to make fabric dye. The alum acts as a mordant, which helps the fabric absorb and hold the color of the plant pigment.
9. If using new cotton fabric for this project, ensure that it is washed to remove any chemicals from the cloth, as these may keep the fabric from absorbing the color.
10. While the fabric is wet, place it in the saucepan and pour the liquid you collected over the fabric. Make sure the fabric is completely submerged. (You may need to put a glass bowl on top of the fabric to help keep it submerged.)
11. (Use your discretion on whether to have youth or an adult perform steps 11 and 12.) Carefully place the pan back on the stove and heat it to simmer (180 degrees F). Keep it simmering for several minutes until the fabric has absorbed the dye. The shorter the time it simmers, the lighter the color; the longer it is allowed to simmer, the darker or richer the color. (Keep an eye on it so the liquid does not evaporate. Add more water as needed.)
12. Once the youth are satisfied with the fabric’s color, have them carefully remove it from the liquid using tongs. (Be careful, as it is hot!) Run cold water over the fabric to cool and rinse it.
13. While wearing rubber gloves, wring out the fabric and hang it up so it can dry.
14. Once it is dry, the fabric can be used for other purposes. Understand that the color when dry will most likely be a little lighter than it was when wet.
15. The liquid can be stored in the refrigerator for a couple of days if you are not ready to process it immediately.
EXTENSIONS:
1. Have the participants assemble a historical fabric dye color wheel.
2. Ask them to experiment with leaving pieces of fabric in the dye bath for different lengths of time to see if it affects the final color.
3. Experiment to see if animal fibers, such as wool and silk, react the same way to plant dyes as plant fibers, such as cotton, bamboo, and flax. 4. Discuss why colors are essential to us and examine food labels to see if natural or synthetic dyes are used in our food. Is there a health concern associated with food dyes?
Activity 3: Making Watercolors from Plant Pigments
OVERVIEW: Through this activity, participants will collect and “cook” a variety of plant materials as they experiment and remove color pigments from the flowers, leaves, roots, and berries they collected. Participants will use these color pigments as watercolors. The process for collecting plant pigments for dyeing and watercolors is similar.
GROUP SIZE: This activity should be done as a group since it will require adult supervision. Caution: One or more hot plates or a stovetop will be used to process the plant material in this activity.
ACTIVITY TIME: You may need to have more sessions depending on how many batches of plant materials you want to “cook” so you collect their color pigments.)
LOCATION: Indoors works best but can be outdoors if an electrical hookup is available.
MATERIALS: Bags or baskets to collect plant parts, scissors or clippers for cutting plant parts, several bowls in which to place the desired plant parts, one or more hot plates or a stove with burners, food blender or food processor, saucepans (one for each burner) in which to boil the plant parts, spoons for stirring, rubber gloves, potholders, watercolor or other white paper, clothesline, spring-operated clothespins, paper/watercolor paper, and watercolor brushes.

-
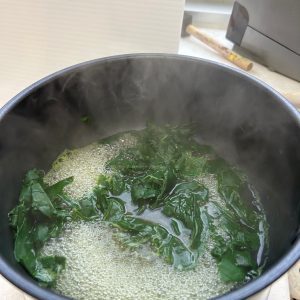
- Pokeweed leaves being processed for their green pigment.

-

- A green pigment collected from pokeweed leaves.
GENERAL PREPARATION AND PROCEDURE:
1. Have the participants reflect on Activity 1 when they rubbed plant materials on paper to remove the colored pigments. Discuss how natural-colored pigments were used historically and can still be used today as a dye or even as a watercolor.
2. Explain to the participants that they will be collecting various plant materials for this activity.
3. Begin by showing students how to collect flower petals, berries, leaves, and roots in the bags or baskets. Explain that for this activity, they will need to collect approximately 1 or 2 cups or more of each item from which pigments are being extracted.
4. Once the plant material has been collected, instruct them on how to process it by carefully cutting and grinding or crushing it to release the pigments. Scissors can be used for cutting, but a food blender or processor works great for this step. Add the plant material to about a cup of water before processing the material.
5. Take the slurry made through the processing stage and place it in the saucepan. Bring the slurry to a boil and keep the material stirred while it is on the hot plate. Let it boil for 1 to 2 minutes to release the color pigments. (During this step, the boiling plants may give off an odor.)
6. Caution: Remove the saucepan from the burner and pour the slurry and liquid into a bowl. Set the bowl aside and allow the slurry to remain there for several minutes as the plant cells continue to rupture, releasing color pigments into the water. (You can clean the saucepan and process another batch of plant material while waiting for the other batch to finish releasing plant pigments.)
7. Once the slurry has rested for several minutes and started to cool, carefully pour the contents of the bowl through a strainer, coffee filter, or cheesecloth into another bowl. This will remove the plant material from the liquid. Instruct the youth to carefully press the plant material using the back of a spoon so the remaining liquid from the plant material is pressed out. You may now dispose of the plant material, keeping just the strained liquid.
8. Instruct them to add ½ teaspoon of alum. The alum acts as a mordant, which helps the paper absorb and hold the color of the plant pigment.
9. Place the liquid back in the saucepan and bring it to a simmer until it is reduced by at least half. (This helps condense the color.) Remove the liquid from the heat and allow it to cool.
10. Have them cut a piece of watercolor paper or a coffee filter to test the color and dip it in the liquid.Allow the piece to dry, and observe the color.
11. Once it has cooled, encourage them to experiment with the remaining liquid in the following ways to adjust its color.
a. Separate the remaining liquid into 3 equal amounts. Empty baby food jars work great for this as they are small and can be individually stored.
b. In one jar containing ⅓ of the liquid, add about½ teaspoon baking soda. Stir and observe how the color changes. You may be creating a chemical reaction by adding a base material to the liquid.
c. In a second jar containing ⅓ of the liquid, add about ½ teaspoon lemon juice. Stir and observe how the color changes. You may be creating a chemical reaction by adding a base material to the liquid.
d. Leave it alone in a third jar containing the remaining ⅓ of the liquid, as this is your control group.
Pokeweed leaves create a greenish-brown color.
12. To help thicken each of the liquids, if desired, add several drops of gum Arabic (acting as a binder) to thicken the paint. Cornstarch may also be used to thicken watercolors. To do so, mix the liquid at about a 2:1 or less ratio of liquid to cornstarch and then heat it slowly while stirring to adjust the thickness.
13. Since the different paints contain organic pigments, they will spoil or sour quickly. To help prevent this, keep them refrigerated when not in use. You can also help preserve them by placing one whole clove in each jar as the oil in cloves contains an antimicrobial agent.
14. The natural watercolors are now ready to be used to create some exciting works of art!
EXTENSIONS:
1. Have the participants create their own color wheel from the watercolors they have discovered. Use the color wheel worksheet on page 12 for this activity.
2. Compare natural watercolors that were made with synthetic watercolors. Ask them the advantages and disadvantages of each one.
Natural Objects Color Wheel
Create a color wheel with plant rubbings or the watercolors you made. Experiment with various plant parts to see what color pigments you see. Write the name of the plant from which the color is extracted on the line inside the circle, and then rub the plant on the area inside the circle to collect its pigment color.


 Doyle Keasal, Extension Associate, Alabama 4-H, Auburn University
New January 2025, Colors to Dye For!, 4HYD-2565