Fish & Water
Rain barrels are available for purchase at many stores and online as well as sold inexpensively through environmental conservation organizations. To save costs and travel, it is important to consider what barrels are available to you locally. If considering the build-your-own option, check with feed supply stores and food distributors; many will sell previously used food-grade barrels. Here you have an opportunity to collect rainwater and reuse something that otherwise would have ended up in a landfill.
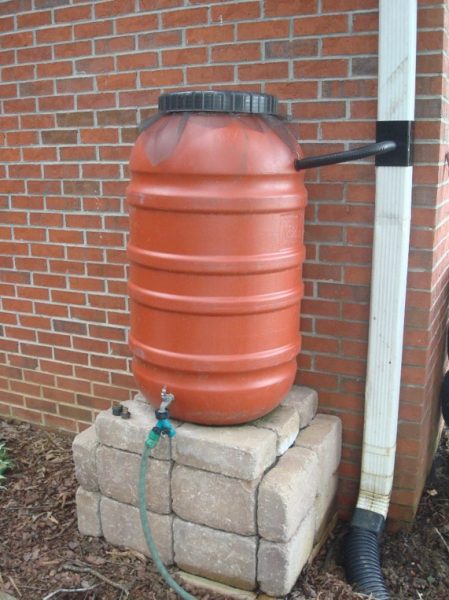
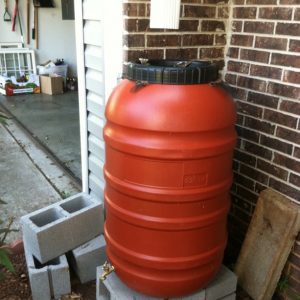
Figure 27. A pickle or olive barrel has a screw top and is typically orange, black, gray, or tan.
In this chapter, instructions are provided for making your own rain barrel from two different and readily available barrel types:
Pickle or Olive Barrel (figure 27)
Advantages
- The screw-top lid makes the top screen more secure than other options and can make the barrel more accessible for maintenance (depending on design).
- Dark-colored barrels reduce algae growth and camouflage well.
- If you do not own a jigsaw, this barrel design saves money on tools as the top is already removable.
Disadvantages
- It may be less available than a sealed barrel.
- It may be more expensive than a sealed barrel.
Soda Barrel (figure 28)
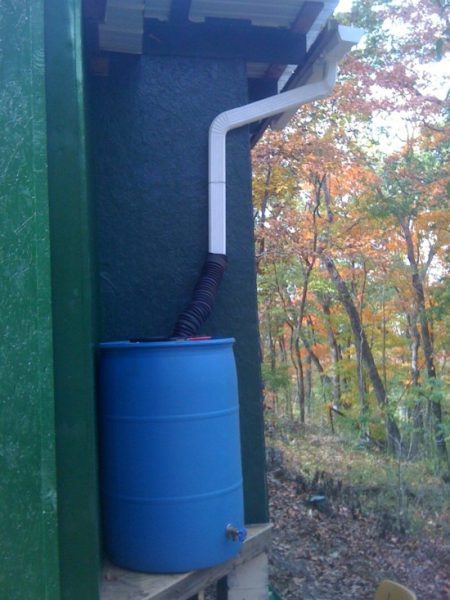
Figure 28. Repurposed soda/syrup barrel collecting roof water. These barrels are sealed at the top and are typically blue or white.
Advantages
- It is typically less expensive and more readily available than the screw-top barrel.
- There is more flexibility in how you open the top of the barrel. Depending on your design and need, you can have the plastic surface mostly intact, which is stable and safe.
Disadvantages
- Depending on how you cut the top, maintenance could be difficult.
- If you choose to completely remove the top, the screen and bungee cord design (shown later) could be a hazard if wildlife, cats, or children have access to the top of the rain barrel.
- The blue color may be difficult to camouflage.
- White or light barrels need to be painted a darker color to reduce algae growth.
Points to Consider
Whether you are purchasing a manufactured rain barrel or building your own, addressing the following considerations will help ensure that your rain barrel functions as intended.
Water Quality and Water Use
Water-quality tests on the runoff from both an asphalt- shingled roof and metal roof showed quality suitable for irrigating vegetables. If you are concerned about the quality coming out of the rain barrel, you can always use a first flush diverter and/or have this water tested. Remember, this water is not for drinking, cooking, or other potable use without further treatment.
Mosquitoes
Some species of mosquitoes breed in water-filled containers and require approximately 7 days to go from harmless egg to major annoyance. To minimize mosquitoes, your rain barrels should be completely screened or sealed. You also can use mosquito dunks to prevent them from developing in your rain barrel.
Outflow Size
It is important to provide a path for water to exit the rain barrel once it is full. In the designs you’ll notice there are two sizes of hole-boring drill bits. The larger hole-boring bit is for rain barrel overflow. Be sure to direct overflow at least 10 feet away from your home and preferably into a pervious area such as a landscaped bed or rain garden. Water should never be directed toward a septic system adsorption field.
Screening Out Debris
Leaves, twigs, and other items can get into your rain barrel and clog the spigot. A secure screen prevents mosquito breeding and assures higher water quality with less maintenance. A rain barrel should never have an open entry point with no screening.
If you are on a heavily wooded lot and have debris frequently accumulating on the top of your rain barrel, consider other available screening options. These include leaf screens and leaf guards that affix to the gutter, funnel-type downspout filters that have built-in screens, and strainer baskets that fit over the exterior of the downspout.
Safety
Small pets or children could fall into a rain barrel if the opening is unsealed or open, so be sure that screening is secure to prevent accidental entry. If you are using a pickle barrel, you might leave the insert below the screw top in place and drill larger holes through the insert to allow water to filter in and provide a stronger surface. The screen would still be used between the insert and the screw top. For sealed barrel designs, you may opt to keep the top and instead insert and cement a grate or pool filter (or similar fixture) that can directly receive runoff from the downspout.
Do children have access to the top of the barrel? If so, additional considerations are needed. This is described further in the second sealed barrel design.
Roof Products
If you use a moss-control product on your roof, be sure that it is garden safe before harvesting this runoff. Removing debris as it accumulates on the roof surface will reduce the amount of material that can be washed into the gutters and rain barrel.
Food Safety
You can definitely use your rain barrel for irrigation on edibles, but using a drip irrigation is a safer way to avoid any contaminated water from getting onto your established vegetables. There are important maintenance and conveyance considerations to keep in mind (see tables 1 and 2).
For consumption by pets, wildlife, and humans, safety depends on what the rainwater contacts before it is consumed. Raindrops are pure, acquiring slight acidity as they fall through the air. Once in contact with your roof and container, however, rainwater is changed by dust, dirt, plant material, fecal matter from birds and rodents, pollen, and so on. Collected rainwater is not suitable for consumption or direct human contact without further treatment.
Table 1. Design and Maintenance of Rainwater Harvesting Systems to Irrigate Edibles
| Cistern or Rain Barrel | Management Strategy | Recommended Practices: Design and Maintenance |
|---|---|---|
| Rain Barrel | Prevent exposure to potentially harmful chemicals. | When building your own rain barrel, be sure that the barrel is food grade and never transported chemicals. |
| Rain Barrel | Disinfect using chlorine application recommendations if concerned about the quality of water in a rain barrel. Note: chlorine will kill beneficial microbes in the soil and should be used sparingly and only when necessary. | Before irrigating a vegetable garden, add unscented bleach with a 5% to 6% chlorine solution at a rate of 1/8 teaspoon per gallon to the harvested water. After treatment, let water stand for 24 hours before applying to vegetables. |
| Both | Prevent accidental ingestion of untreated water. | Label spigot with “Do Not Drink” or other nonpotable-water message. Use hangtag or sticker. Make sure language is culturally appropriate. |
| Both | Prevent insects and small animals from entering the tank. | Make sure that screening, point of entry, and top are secured. |
| Both | Remove leaves, twigs, sediment, and other forms of debris that may contaminate water. | Clear debris from gutters and downspouts at least twice a year. |
| Rain Barrel | Remove leaves, twigs, sediment, and other forms of debris that may contaminate water. | Clear debris from screened inlet at least four times a year. |
| Cistern | Remove leaves, twigs, sediment, and other forms of debris that may contaminate water. | Clear debris from downspout filter, basket filter, vortex filter, and/or first flush diverter at least four times a year. |
| Both | Maintain healthy soils, which have greater ability to offset risk. | Add compost and other amendments rich in organic content. |
| Both | Use harvested rainwater regularly to prevent stagnation and associated water-quality degradation. | Use the water! |
Table 2. Application of Harvested Rainwater on Edibles
| Management Strategy | Recommended Practice |
|---|---|
| Allow time for solar treatment. | Apply water in the morning. Do not apply water the day of harvest. |
| Decrease direct contact of potential pollutants in harvested rainwater with plants and fruit. | Do not apply water directly to plant (foliar application); apply instead to soil around the plant base. Apply with drip irrigation or other method that applies water to soil (ex. watering can). |
| Prevent ingestion of harmful materials such as bacteria. | After harvest, wash fruits, vegetables, and herbs thoroughly with cool, potable/treated water. Store at proper temperature. After hands or other body parts have had direct contact with harvested rainwater, wash thoroughly with soap and potable/treated water. |
Retrofitting a Rain Barrel
Suppose you have a commercial rain barrel but the overflow is small (3⁄4 inch). Based on rainfall amounts in Alabama, we advise that the rain barrel be retrofitted (according to the steps identified in each design) to accommodate a larger overflow of at least 1 1⁄4 inch.
Getting Started
Choose Your Barrel
When selecting a barrel, only use one that has contained food-grade materials (nonmeat preferred). Other types of barrels are sometimes used for chemicals such as commercial soaps, which may not be safe for your plants or the environment.
You can often find food-grade barrels for reuse and retrofitting through feed supply stores, soda companies, Craigslist, Facebook Marketplace, and farmers who have them for sale. The two design options featured here use (1) a pickle or olive barrel and (2) a screened-top soda barrel.
Clean Your Recycled Barrel
Before you begin, you need to rinse out the barrel with a hose. If there are lingering odors, add 2 teaspoons of castile soap and 2 teaspoons of lemon juice or vinegar for every gallon of water used to clean your barrel. Using commercial cleaning products or bleach is less preferred due to potential impacts to soil and plants that will come in contact with the water stored in the rain barrel.
Castile soap can be found at many grocery stores. It is a multipurpose soap made of fats from vegetable origins versus animal origins; it will easily rinse out and not harm the environment like other cleaners could.
Choose Your Design
How you construct your rain barrel can be very specific to your needs and interests. The designs featured here are found to be useful and effective for residential and small-scale rainwater harvesting and reuse. There are many ways to harvest rainwater, however, so do not feel restricted to these designs. No matter how you choose to construct your barrel, there are four components that should always be present:
1. The food-grade barrel you will use to collect the rainwater
2. An inlet that is designed to allow rainwater into the barrel but keep out twigs, leaves, mosquitoes, and potentially other creatures
3. An outlet you can turn on and off to drain your water
4. An emergency overflow that directs water away from your home and to an infiltration area when the barrel is at capacity
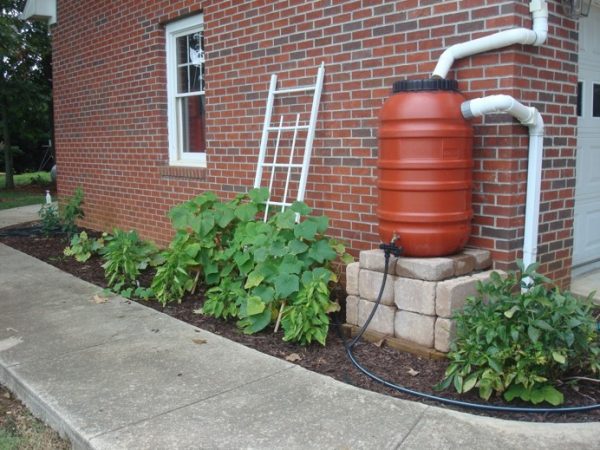
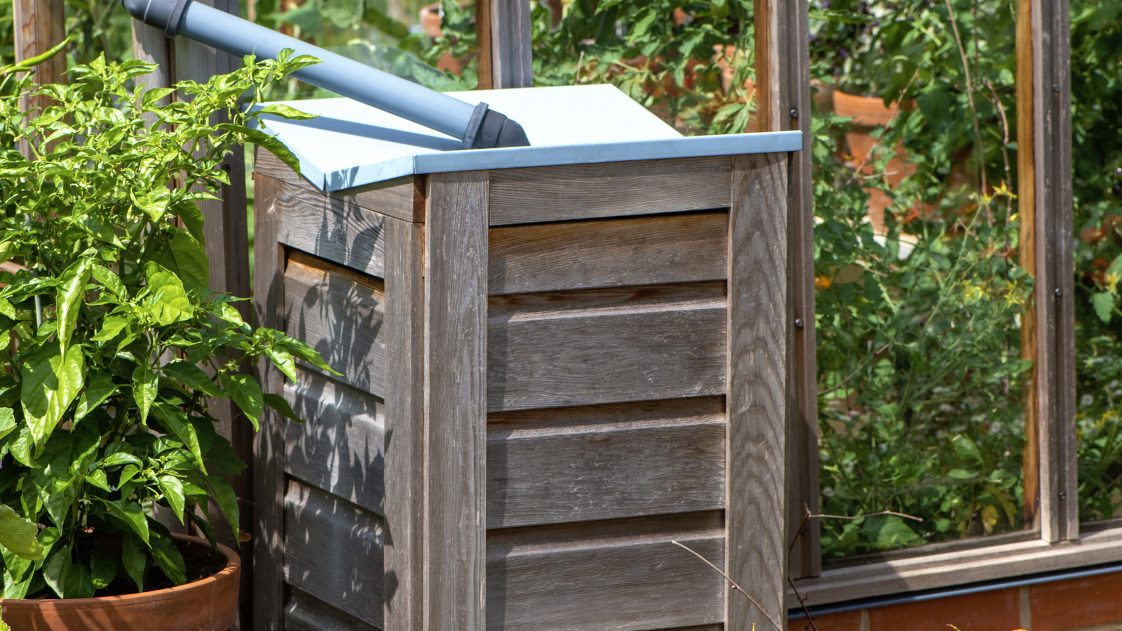
Figure 29. Elevated olive barrel collecting rooftop rainwater with overflow valve directed to downspout; hose connected for watering nearby plants
Gather Your Tools
For the most part, the standard tools you’ll need are the same for all the featured barrels. Exceptions will be noted with each design.
- Two hole-boring drill bits: 1 1⁄2 inch and 1 inch. You can use a paddle drill bit, but for those new to power tools we find the boring drill bit much easier to work with.
- Adjustable channel lock pliers
- Shoe rasp (a tool that can smooth edges of wood, metal, and plastic)
- Box cutter
- Scissors
- Flathead screwdriver
- Caulking gun and silicone
- Teflon tape
- Safety glasses
- Gloves, if desired
Note: This list does not include materials that may be needed to raise your rain barrel (concrete blocks for example), nor does it include downspout diverters, PVC elbows, first flush diverters, pumps, or other PVC piping that may be desired for larger irrigation systems.
If disconnecting a downspout, be sure to measure the inside diameter of the standpipe (the pipe connected to the gutter that leads underground to a sewer or other drainage system) so that the correct size rubber cap and hose clamp are purchased. If the downspout is only attached to the standpipe and a gutter, a strap or bracket should be used to attach the downspout firmly to the building once it is disconnected. Use durable materials for the elbows and extensions; avoid using corrugated plastic, PVC, dryer hose, or other materials that will degrade quickly.14
Design 1: Pickle or Olive Barrel
For the components of this rain barrel design, you need the following:
- Food-grade, screw-top barrel (figure 30)
- Fiberglass screen, enough to secure around the top of your barrel (2 × 2 feet), plus some extra. Do not use a metal screen as it will have sharp edges (figure 31).
- 3⁄4-inch hose bib quarter-turn brass spigot (figure 32)
- 1-inch flat washer
- 1 1⁄2-inch threaded hose adapter for 1 1⁄4-inch hose. You can find this as a set called a “universal drain kit” that has the hose clamp included as well.
- 2 × 1–inch PVC sch40 bushing
- 1 1⁄2-inch hose clamp
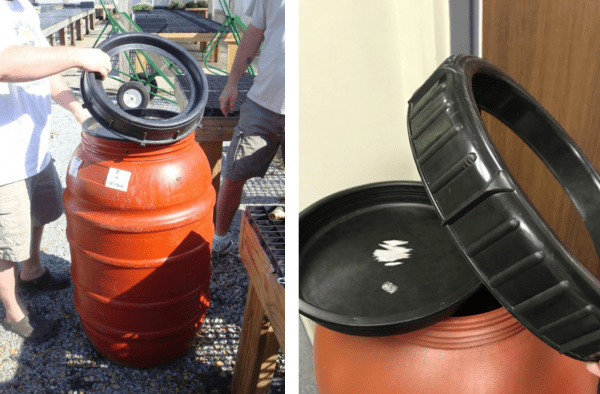
Figure 30. Recycled olive barrel soon to become rain barrel
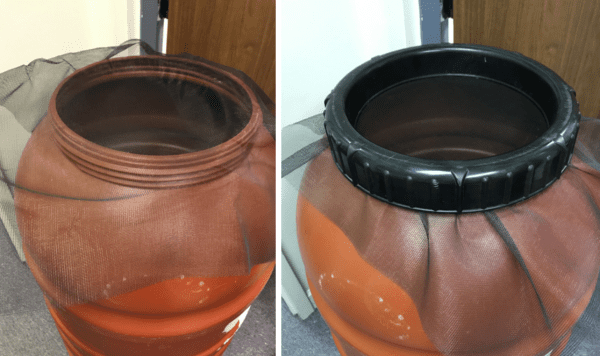
Figure 31. Fiberglass window screen for reused olive barrel
Completing Your Rain Barrel
1. Using a drill and 3⁄4-inch drill bit, make hole for spigot on flat area of barrel at minimum 1 inch below last indentation at bottom of barrel (figure 33). Remember height consideration.
2. Switch drill bits and drill larger outflow with 1 1⁄2-inch bit in direction you want overflow to be directed. This style rain barrel can overflow out of the top as well.
3. Use rasp if needed to enlarge lower hole to fit spigot in tightly.
4. When hole is ready, place washer on spigot and add silicone to side of washer that is against side of barrel (if you want to use silicone). Line threads of spigot with Teflon tape if you want an extra secure fit. Apply tape in clockwise fashion, holding spigot towards you, then push in spigot.
5. On inside of barrel, secure spigot with 2 × 3⁄4–inch female threaded plastic bushing. Tighten with channel lock pliers. It may take one person to hold spigot on outside of barrel while the other works from inside.
-
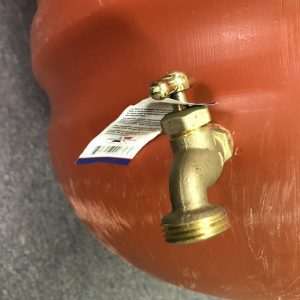
- Figure 32. Rain barrel spigot
-
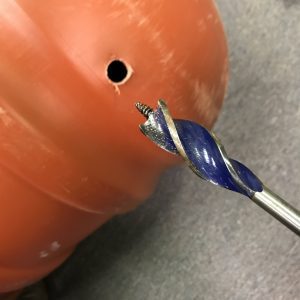
- Figure 33. Use a 3⁄4-inch drill bit to drill the hole in the rain barrel.
-
- Figure 34. Finished rain barrel, slightly elevated, under gutter downspout
6. Similarly, use rasp for overflow, ensuring a tight fit.
7. When hole is ready, use silicone against flat edge of bushing to secure back of hose adaptor. Tighten with channel lock pliers.
8. For overflow, cut a small square of screen to put over hose adapter if you want; then add hose with hose clamp already on it. The screen is an extra step in preventing mosquitoes.
9. For top of barrel, cut screen size to fit under screw- top lid, which will screw over screen and be fairly secure.
10. If you used silicone, give some time (24 hours or so) for silicone to dry completely. You are now ready to install your new rain barrel!
Design 2: Screened-Top Soda Barrel
Additions to Standard Tools and Components
- Reciprocating saw (or jigsaw)
- Sanding paper
Materials
- Food-grade, sealed plastic barrel
- Fiberglass screen, enough to secure around top of barrel, plus some (about 4 × 4 feet)
- 3⁄4-inch hose bib quarter-turn brass spigot
- 1 1⁄2-inch 45-degree PVC street elbow
- 1 1⁄2 × 11⁄4–inch PVC male adapter and nut
- Metal snap-down barrel rim fastener. This is recommended, but, if unavailable, a 4-foot bungee cord can be used.
Completing Your Rain Barrel
1. Drill hole in top of barrel to accommodate reciprocating/jigsaw.
2. Use reciprocating saw to cut top off barrel (from top and not from side, about 1 to 2 inches in from rim). Trim away excess plastic shards using box cutter,
and sand cut surfaces.
3. Drill a 3⁄4-inch hole in side of barrel about 2 inches above bottom (figure 35). This will be for the spigot. Use a 1⁄2-inch brass spigot to cut threads for spigot. Another option is to use a 3⁄4-inch tap to cut threads for spigot. You may need to install Teflon tape or silicon around spigot if it leaks.
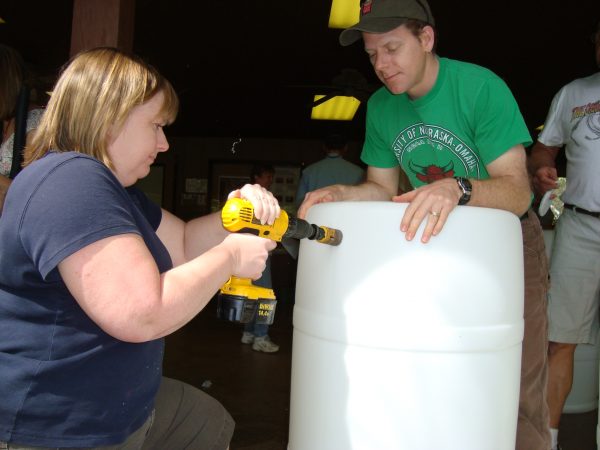
Figure 35. Drilling spigot hole in rain barrel
4. When hole is ready, place washer on spigot and add silicone to side of washer that will be against side of barrel. Line threads of spigot with Teflon tape. Apply tape in clockwise fashion, holding spigot towards you, then push in spigot.
5. Apply silicone to flat side of 2 × 3⁄4–inch bushing, which will secure back end of spigot. On inside of barrel, secure spigot with 2 × 3⁄4–inch female threaded plastic bushing and tighten with channel lock pliers. It will take one person to hold spigot on outside of barrel while another works from inside.
6. Drill 11⁄2-inch hole in side of barrel, 2 1⁄2 inches below top and at 90 degrees from bottom hole. This hole will be too small for the 1 1⁄2 × 1 1⁄4–inch PVC male adapter. Use a shoe rasp to enlarge hole (no more than 1/16 inch). Frequently try to screw in adapter. Leaking here will be less of a problem than with the lower assembly, but have adapter fit as tightly as possible.
7. Screw 1 1⁄2 × 1 1⁄4–inch PVC male adapter into upper hole of barrel to create overflow.
8. Apply generous amount of silicone to threading of 1 1⁄2 × 1 1⁄4–inch male adapter on inside of barrel.
9. Screw nut onto male adapter and hand tighten.
10. Measure and cut screening to allow 3 to 4 inches of overhang all the way around top of barrel. Do not skimp on the overhang!
11. Lay cut screen over barrel and look for any extra room on any corners.
12. Cut a circle from the extra room big enough to cover opening of the 45-degree PVC street elbow, with a bit of overhang (about 2 inches in diameter).
13. Insert screen circle into PVC male adapter overflow from the outside.
14. Insert 45-degree PVC street elbow into outer side of overflow to hold screen circle in place.
15. Lay screen on top of barrel.
16. Put rim fastener over top of screen and onto rim of barrel, loosely attaching nut and bolt.
17. Position rim fastener so that it will easily tighten without having to readjust its position.
18. Tighten screen under rim fastener by pulling screen all around the barrel.
19. Tighten rim fastener loosely and retighten screen.
20. Tighten rim fastener the rest of the way, leaving plenty of screen overhang for easier attachment after removal.
21. Give some time (24 hours or so) for silicone to dry completely. You are now ready to deploy your new rain barrel!
![]()
 Laura Bell, Project Coordinator; Eve Brantley, Extension Resources Specialist and Professor; Naomi Pitts, Watershed Program Assistant; and Caitlin Sweeney, Watershed Program Assistant, all with Alabama Extension Water Program, Auburn University
Special thanks to Rhonda Britton, Regional Extension Agent, for her contributions to this handbook.
New August 2021, A Homeowner’s Guide to Rainwater Harvesting in Alabama, ANR-2794