Fish & Water
This is an excerpt from “Pond Building: A Guide to Planning, Constructing & Maintaining Recreational Ponds,” ANR-1114. Find all sections of the publication at www.aces.edu.
PERMIT REQUIREMENTS
The owner must obtain any required permits before hiring a contractor. If wetlands are involved, a permit may be required from the U. S. Army Corps of Engineers (see Wetland Restrictions). Pond sites that involve one or more acres of land disturbance during construction require a National Pollution Discharge Elimination System (NPDES) permit issued by the Alabama Department of Environmental Management (ADEM). This permit requires that a best management practices (BMP) plan be developed and implemented to control erosion during construction and also requires that the BMPs be monitored to ensure that they are working properly. Contact the NRCS and ADEM for more information concerning NPDES permits.
HIRING A CONTRACTOR
Unless you have the necessary equipment, you will need to hire a contractor to build the pond. A list of pond contractors can sometimes be obtained at your local NRCS office. You may wish to receive bids from several contractors to be sure you are getting the best- quality job done at the lowest cost. It is always best to talk with others who have had ponds built by the contractor in your area. Ask for references from your prospective contractor before finally contracting your construction project.
Before contracting, have a set of plans and specifications prepared. The plans should show all elevations and dimensions of the dam and emergency spillway; the dimensions and extent of the cutoff trench and other areas requiring backfill; and the location, dimensions, and elevations of the principal spillway, bank contours, and other planned structures. The plan also should include a list of the quantity and kind of building materials required.
The specifications should give all the information not shown on the plans that is necessary to define what is to be done, prescribe how the work is to be done if such direction is required, specify the quality of material and workmanship required, and define the method of measurement and the unit of payment for the various items of work that constitute the whole job.
Construction work of the quality and standards desired will not result unless there is a clear understanding between the owner and the contractor of all the requirements for the job. For these reasons, good plans and specifications should be prepared for all ponds for which an owner awards a contract.
While the local Soil and Water Conservation District and the NRCS professionals may provide input and some review of pond construction plans, private consultants and construction engineers should prepare the plans and specifications. Of course the final responsibility of ensuring that the job is constructed according to plans and specifications is the owner’s.
CONSTRUCTION COSTS
The cost of constructing a pond can be highly variable. On a per-acre basis, small ponds are generally more expensive than larger ponds. The largest single factor controlling the cost of constructing a pond is the amount of earth moving required. Other costs, such as clearing, site preparation, pipe, concrete, and seeding and mulching are often only incidental compared to the earthmoving cost.
The best way to contract the work of building the pond is to have individual unit prices and pre-agreed-upon costs for every item to be completed in the construction of the pond. Some pond owners elect to “lump sum” the job. That is, the contractor gives them one price for the entire completed job. This is fine unless changes in construction are required, in which case modifications to the work are difficult to price. Some contractors may want to do all or portions of the work on an hourly basis. This could prove to be expensive since the pond owner has no control over the time required to do the work.
The cost of installing a pond can sometimes be shared through government programs if the pond actually reduces downstream water pollution or is used as a source of water for livestock. Check with the local Soil and Water Conservation District office and the NRCS for potential cost-share money.
Tip to Remember
Construction work of the quality and standards desired will not result unless there is a clear understanding between the owner and the contractor of all the requirements for the job.
SITE PREPARATION
The contractor must prepare the surface of the soil on which the earthen dam will be constructed, the emergency spillway location, and any borrow locations before beginning the earthmoving operations. Site preparation involves clearing trees from the area, removing stumps and roots, and removing any type of organic material. This may even include the removal of some organic soil if present.
Trees, stumps, and roots should never be buried at a location that eventually will be underneath the earthen dam. Most contractors can burn the cleared material and bury the unburned remains at a location that will not affect the dam.
The pool area of the pond also should be cleared. If a structure for fishing is planned for the pond, some stumps can be left. Any debris that could easily float should be removed because it can clog the principal spillway pipe system and threaten the safety of the dam.
CUTOFF TRENCH AND DAM CORE
Potential seepage underneath a dam must be prevented to avoid excessive water loss and possible failure of the dam. To prevent excessive seepage, a cutoff trench should be excavated at least 12 inches into impervious material beneath the dam (see figures 6, 14, 15). The trench is generally excavated along the center line of the dam and extends up each abutment of the dam as far as there is any previous material that might allow seepage. The bottom of the trench should be no less than 8 feet wide and the sides no steeper than 1:1. The old channel underneath the dam should also be cleaned out using the same procedures as those for excavating the cutoff.
Trench excavation can be hazardous work. Cave-ins can occur if the walls of the trench are not sloped. Often, the depths shown on the plans for the cutoff trench are only approximate; therefore, an on-site inspection should be made before the trench is backfilled. If there is a cutoff trench near any existing or former stream bed or waterway, the trench must be deeper and wider so that all stones, gravel, sand, sediment, stumps, roots, organic matter, and any other objectionable material that could interfere with proper bonding of the earthfill and foundation can be removed.
Before backfilling operations are attempted, you must pump any accumulated water from the cutoff trench. The trench should be damp (not wet) and lightly scarified before the first layer of fill material is placed in the core. The core of the dam is the interior portion of the dam from the bottom of the cutoff trench to the top of the dam and is compacted with the best available clay material.
-
- Figure 14. Initial clearing for base of po
-
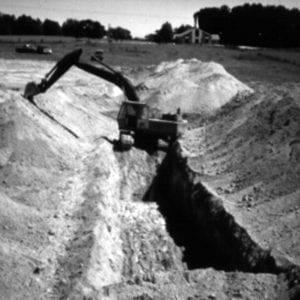
- Figure 15. Excavation of cutoff trench below base of pond dam
-
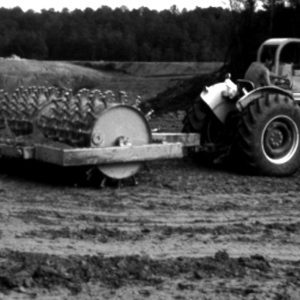
- Figure 16. Use of sheepsfoot roller to compact earthfill
SOIL MOISTURE/COMPACTION
 Good compaction requires that the soil be moist and the compactors and rollers be adequate. The dam must be built gradually in thin layers (6 to 8 inches), and heavy equipment and/or sheepsfoot rollers should be used to ensure that the soil receives adequate compacting effort (figure 16). The moisture content of the soil must be monitored. Soil that is either too dry or too wet will not properly compact, regardless of the compacting effort.
During the construction process, the dam should be slightly overbuilt (about 5 percent) to allow for settlement, which will occur over time. The dam should also have at least 3:1 (horizontal to vertical) side slopes that are easy to maintain, and a top width of at least 16 feet if the top of the dam is to be used for vehicle traffic.
PRINCIPAL SPILLWAY
Good compaction of the earthfill around the barrel pipe is extremely important. The fill should be compacted using manually directed power tampers to ensure good compaction against the pipe. Manual compaction should continue around the barrel pipe until at least 2 feet of material is over the pipe. Extreme care should be taken with the compaction around the barrel pipe since this area is often the weakest portion of the earthfill and where the majority of dams fail.
If the pond site has continuously flowing water due to an excessively large watershed or spring, a diversion ditch may be needed to divert the water away from the installation of the barrel pipe. Once the earthfill is 2 or more feet over the barrel pipe, the stream can flow through the pipe to complete construction of the dam.
A valve is often attached to the end of the barrel pipe in the pond to allow the pond to be occasionally drained for maintenance purposes. A stem is attached to the valve to allow operation from above the water surface (see figure 6).
EMERGENCY SPILLWAY
The emergency spillway for the pond is constructed on one end of the dam in undisturbed soil, is transversely level to prevent meandering of water, and should be established and maintained with a good stand of grass. The flow through the emergency spillway should be shallow, slow, and uniform to minimize the possibility of the spillway eroding and causing failure of the dam. Likewise, the natural ground where the emergency spillway empties should not erode and thereby cause damage to the spillway. The spillway also must convey the water safely to the valley below the dam without damaging the downstream slope of the dam (see figure 2).
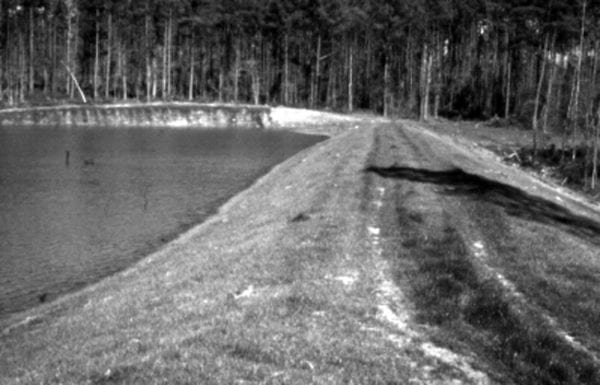
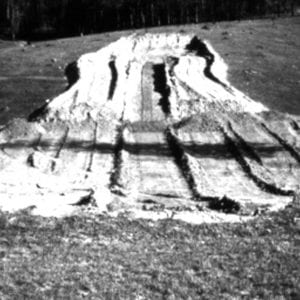
Figure 17. Seed new pond embankments to establish vegetative cover and reduce erosion.
ESTABLISHING VEGETATION
The final step in good pond construction, and one of the most important, is to establish good vegetative cover over all exposed areas around the pond (figure 17). Too often, pond owners forget this critical step and quickly discover that the pond dam and banks are suffering from severe erosion and siltation. Ideally, topsoil should be set aside during the initial site preparation for construction. Following construction, the stockpiled topsoil should be spread, limed (if needed), and fertilized. The prepared soil can then be seeded, sprigged, or sodded with the appropriate grasses and sod-forming legumes. Depending on the season following construction, a cool- season ground cover can be planted in the fall, followed by overseeding in the spring with warm-season varieties. Check with your county Extension office for best ground covers and planting dates for your area.
 Revised by Russell Wright, Extension Fisheries Specialist, School of Fisheries, Aquaculture, and Aquatic Sciences, Auburn University. Written by Chris Hyde, Extension Aquaculturist, Department of Fisheries and Allied Aquacultures, Auburn University, and Perry Oakes, State Conservation Engineer, USDA Natural Resources Conservation Service, Alabama. Adapted from “Ponds–Planning, Design, Construction,” USDA NRCS. 2000. Agricultural Handbook Number 590.Washington, D.C.
Revised August 2023, Pond Building: A Guide to Planning, Constructing & Maintaining Recreational Ponds, ANR-1114