
Alabama 4-H

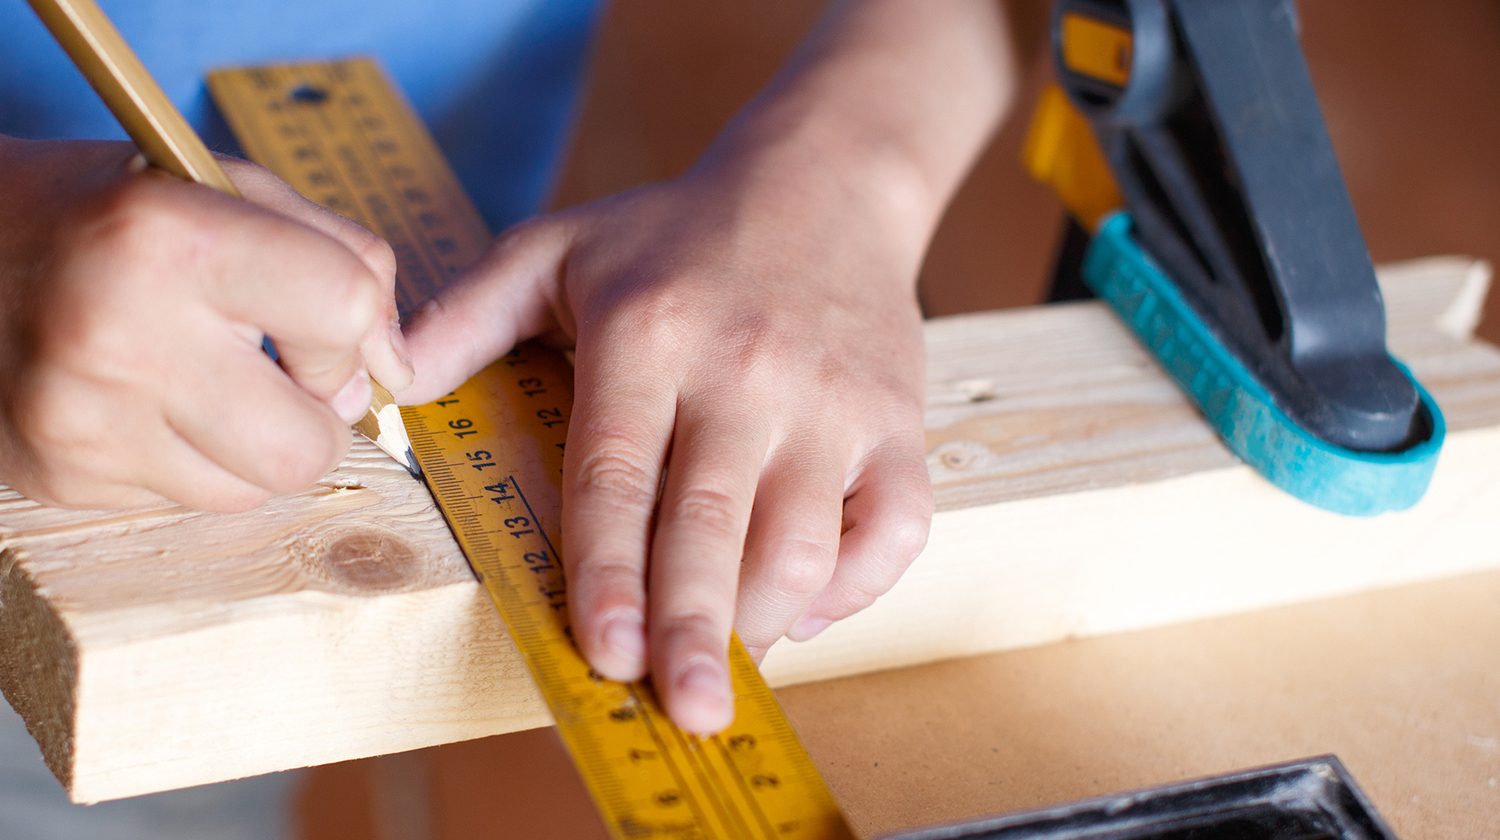
Woodworking is a great tradition. Wood is perfect for building everything from houses to hat racks. You can paint it or show off its natural grain and shine. This project helps you develop skills in woodworking. You must make decisions about what you like and dislike. You can design your own project, or you can search for a plan you would like to follow.
What You Will Learn
- To appreciate the basics of good design.
- To recognize and practice good and safe work techniques.
- To explore your personal design preferences, making your own decisions.
- To develop and practice skills that will be useful throughout your life.
Levels of Competition
Junior Level I: 9 to 11 years old on December 31 of the current calendar year (compete only at local and regional levels).
Intermediate: 12 to 13 years old on December 31 of the current calendar year (compete only at local and regional levels).
Senior Level I: 14 to 15 years old on December 31 of the current calendar year.
Senior Level II: 16 to 18 years old on December 31 of the current calendar year.
Refer to Alabama 4-H Competitive Events on the Alabama Extension website (www.aces.edu) to review the Competitive Events General Policy and the Age & Eligibility Chart.
Where Do I Start?
There are two ways of doing this: you may create an original design work from a pattern you have found.
If you want to create an original item, look at pictures to get ideas about what it looks like or how it is put together.
If you want to work from a pattern, visit a hardware or hobby store, search the Internet, or go to your school or community library.
It is extremely important that you practice good safety in using tools. Use tools under the close supervision of a responsible adult.
- Think Before You Cut. The most powerful tool in your shop is your brain—use it. Thinking through your cuts and movements before acting can help save both fingers and scrap wood.
- Keep a Clean Shop. A cluttered shop is an accident waiting to happen. Keeping your shop clean will help protect you (and your tools) from tripping hazards.
- Avoid Distractions. Pay attention to your actions. Looking up to watch TV or a visitor can result in your hand contacting the blade. Always wait until you have completed your cut before you take your eyes off the blade.
- Do Not Rush. Keep in mind that this is just a hobby. Take a break when you feel rushed or frustrated with a project. Mistakes happen when we rush to complete a job.
- Protect Yourself. Wearing proper shop protection is an important part of safe tool operation. Goggles, ear protection, and lung protection should be used when operating tools. Use push sticks when working close to the blade, and make sure the tool’s safety features are in place.
- Let the Tool Stop. Not giving the power tool time to wind down after a cut is an often overlooked safety mistake. Even without power, the spinning blade can still do a lot of damage.
- Fumes and Dust. Solvent fumes and airborne dust can present health and explosion hazards. Be sure you have a supply of fresh air, and use only explosion-proof vent fans.
- Wear Appropriate Clothing. Loose clothing or hair can get caught in power tools and cause severe injury.
Identification of Entry
Name, county, and level of participation should be displayed with each entry. 4-H project exhibit cards are available, but not required.
Junior and Intermediate Project: Foot Stool
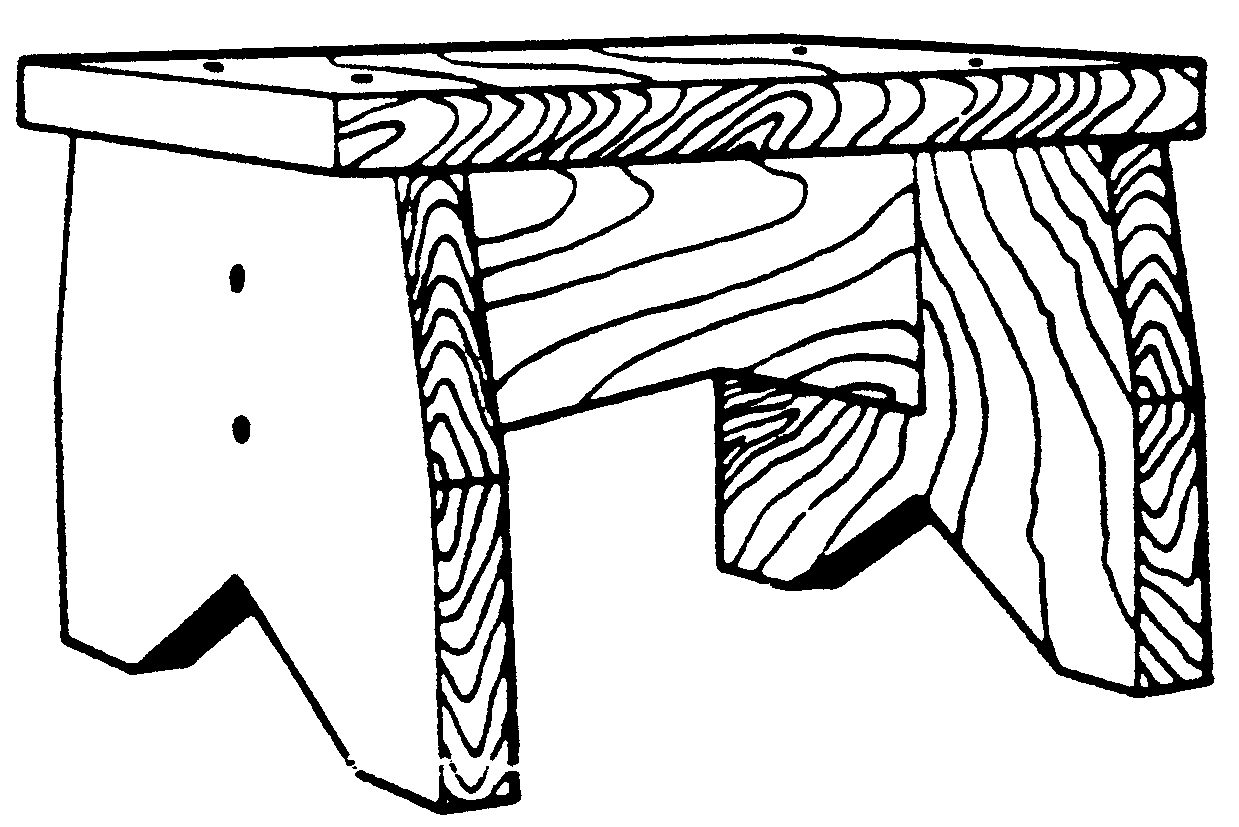 This project will help participants develop basic woodworking skills while creating a foot stool to use and treasure for years to come.
Materials:
- 1– 24″ piece 1″ × 8″ dressed softwood for top and legs (actual dimensions about ¾″ × 7½″)
- 1– 10″piece 1″ × 4″ dressed softwood for stretcher (actual dimensions about ¾″ × 3½″)
- 8– 1½″ flathead wood screws
- Sandpaper
- Stain and varnish for finishing Optional: Letter, monogram, or other wood shape cutouts may be purchased to help participants personalize the keepsake box. (These are available at craft stores or can be ordered online.)
Tools Needed:
- Pencil
- Ruler
- Handsaw
- Jigsaw or coping saw
- Drill
- Screwdriver
 Instructions:
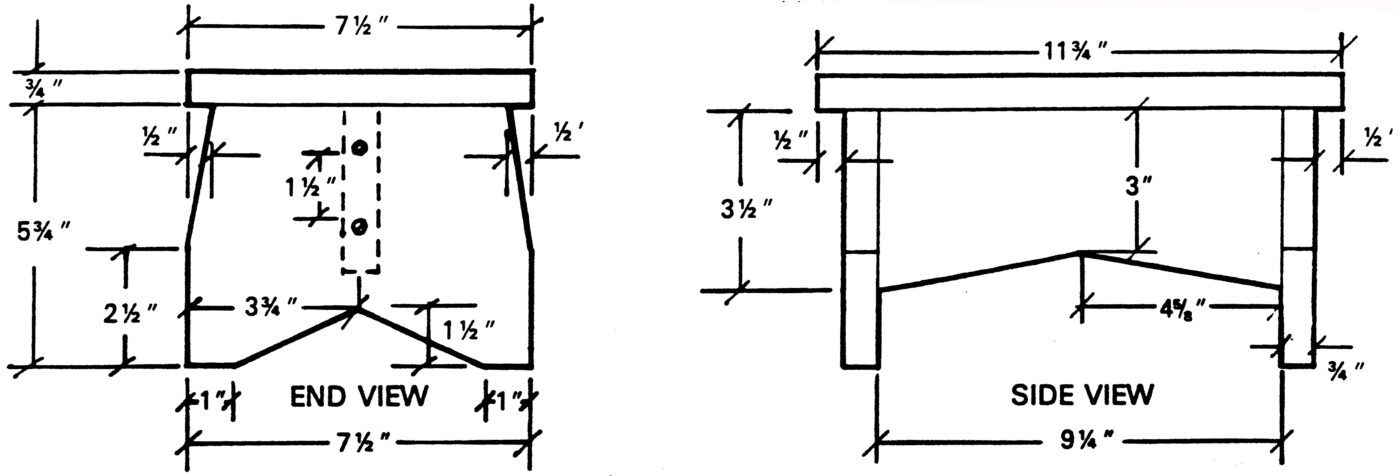
1. From the piece of 1″ × 8″ softwood, cut one piece 11¾″ long for the top. Cut the remaining piece into 2– 5¾″ pieces for legs.
2. Trim the 1″ × 4″ softwood down to 9¼″ for the stretcher.
3. With a pencil, mark the position for the screws on the legs. The marks should be half the distance between each edge.
4. Carefully follow the measurements shown on the end view to measure and mark the sides and bottom of the legs. Use a straight edge to draw the cutting lines. Cut with a jigsaw or coping saw.
5. Use the measurements shown in the side view to measure and mark the stretcher. Use a jigsaw or coping saw to make the cuts.
6. Drill holes at the points marked for the screws on the legs. Mark these positions and drill holes for screws in the ends of the stretcher. Center the holes in the stretcher ends so the wood won’t split. Attach the stretcher to the legs with wood screws.
7. Mark and drill 4 holes to attach to the top of the legs. Center holes in the top edge of the legs so the wood won’t split. Attach the top with wood screws.
8. Sand the surfaces and edges.
9. Apply stain and varnish (no paint).
Senior Level I & II Project: Bookcase
The basics are simple:
1. Compete by yourself or on a two-person team. Youth on teams must be the same 4-H age level (e.g., Senior Level II).
2. You must create an original design or work from a pattern you have found.
3. You must do all the construction yourself.
4. You can’t use a kit.
5. Your name and county need to be on a small piece of tape attached to your project.
6. Provide a copy of the plan for your bookcase.
7. Your bookcase must meet the following criteria:
- Any type of wood may be used in this project, including repurposed materials.
- The bookcase must measure between 30″ and 48″ in height. (Think about how wide the bookcase needs to be to fit space where you want to use it.)
- The bookcase must be between 30″ and 84″ tall. (Standard bookcase heights are 30″, 36″, 48″, 60″, 72″, and 84″.) Use a height that best meets your needs.
- The depth of the bookcase shelves needs to be between 10″ and 14″.
- The height or space between each bookshelf needs to be based on what will be stored or placed on each shelf. You may want to make the shelves adjustable. Average shelf spacing 8″, 12″, or 15″ for oversized books. On a taller bookcase, you may want to permanently fix a shelf in the center for stability.
- The bookcase may be stained, painted, or a combination of both.
8. Address any safety hazards that your bookcase may present. For example, a tall bookcase needs a way to fasten it to the wall.
9. Let your creativity shine. Think of other features that you can use to make your bookcase special. If you are going away to college or have a study desk at home, you may want to construct a bookcase that will fit above another piece of furniture. If you might use your bookcase as a storage unit, you may consider putting doors on it. Remember you are constructing a piece of furniture you can use for years.
10. Seniors must identify any safety hazards.
Disqualification in What Wood U Build
- Not following the instructions listed under the project on page 2.
- Building the game larger than the regulation AOC dimensions.
- Using a kit.
- Creating a design for the woodworking project that features culturally or racially insensitive images that violate 4-H’s values of respect, fairness, and caring. This will not be permitted.
- Failing to have written permission if you use any logo or art design that is trademarked or copyright protected.
Career Connections
Skills developed through this project have direct connections to many exciting and rewarding careers and lifelong hobbies. These include carpentry and cabinet making, construction, design, teaching, industrial design, interior design, theater set design, fine arts and crafts, and hardware sales. There are also opportunities to learn how to build and sell your own new products.
Community Service
Telling a great story, showcasing projects at a community library, speaking at a local nursing home, or organizing a community cooking or building blocks workshop are great opportunities to serve others. Serving others helps you build academic skills, learn civic responsibility, and develop leadership. It may also give you a good opportunity to meet new people, publicize 4-H, and practice your communication skills. Alabama 4-H is now requiring all senior level 4-H members to add a community service component to all 4-H Competitive Events. Each senior level 4-H member will have to complete the 4-H Community Service Report as part of his or her project. 4-H members will be disqualified if the community service report is not included.
You must decide what service you can provide and not have a parent or 4-H leader make this decision for you. Groups of young people are encouraged to work together to discover how they can serve their community.
Score Sheet
View the score sheet for What Wood U Build? in the corresponding PDF download below.

Doyle Keasal, former Extension Associate, Alabama 4-H, Auburn University
Revised August 2026, What Wood U Build?, 4HYD-2241-S
For more information, contact your county Extension office. Visit www.aces.edu/directory.
Trade and brand names used in this publication are given for information purposes only. No guarantee, endorsement, or discrimination among comparable products is intended or implied by the Alabama Cooperative Extension System.