Lawn & Garden
Conditioned straw bales offer a versatile and affordable method of growing vegetables for gardeners with space, soil, or physical limitations.
Straw bale gardening is simply planting vegetables into a straw bale that has been conditioned or gone through a composting phase. This method may be beneficial for sites with poor soil or without enough space for a traditional garden. Straw bales can be used to grow vegetables on driveways, porches, or anywhere they will get full sun and water. Gardeners who have limited mobility or those who find it hard to use traditional tools, such as a shovel or hoe, may prefer straw bale gardening.
The bale preparation process takes a few weeks. Once conditioned, and with proper planning, planting, and maintenance, your straw bale can deliver delicious produce, possibly for more than one growing season.
Start with a Wheat Straw Bale
Wheat straw bales are the best choice for this type of garden. Pine straw bales do not break down as easily, and hay bales will host more weed seeds.
Wheat straw bales easily are found at most home improvement stores or local farms. Make sure the straw bales are held together tightly with twine. As the straw bale is conditioned and planted, the twine will help hold it all together. Older straw bales may be used, but make sure the twine is still tightly in place.
Place Bales in the Correct Location
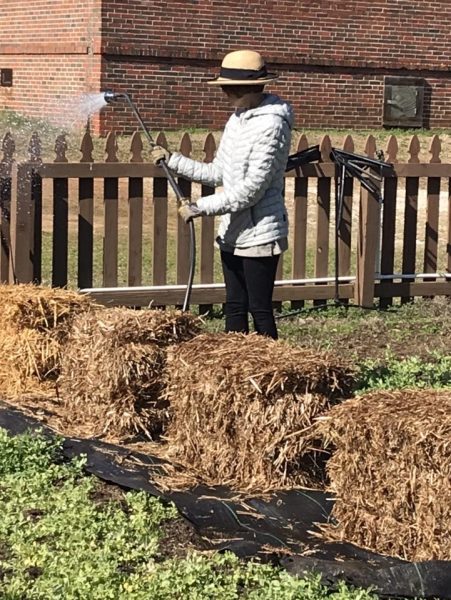
Figure 1. Straw bales are placed in a sunny location where they will not be moved. They become heavy when saturated with water and the composting process begins.
Choose a well-drained area in full sun, close to a hose. Once the composting process starts, the straw bales will be too heavy to move (figure 1).
Lay out the bales in any configuration you like. Place a few sections of newspaper, cardboard, or landscape fabric underneath the bales to prevent weeds from growing into them. The straw bale should be placed so that the twine holding the bale together runs along the side of the bale. This will hold the straw bales together.
Condition the Bales
Once the bales are in position, water them until they are saturated; this will start the composting process and provide organic material for the plants to use while growing.
Like any composting process, the ratio of carbon to nitrogen will speed up the natural composting process, allowing beneficial bacteria and fungi to do the work. A straw bale has a large amount of carbon already in it, so nitrogen will need to be added to get the composting started. Rapid composting is preferable so that the bale is still intact and acts as a natural container. This usually can be accomplished in just a few weeks.
Following are easy steps to take to ensure that your bale is ready for planting:
Days 1 and 2. Water the bale well. Each bale must be completely saturated for the composting process to begin.
Days 3 to 9. Scatter 1⁄2 cup of high-nitrogen fertilizer on the bale each day (figure 2). Always broadcast the fertilizer evenly over the top of the bale. Use a synthetic fertilizer such as urea (46-0-0) or all-purpose fertilizer (36-0-0), or choose an organic fertilizer such as blood meal (12-1-0). Water-soluble fertilizers will start the composting process more quickly. Water the bale thoroughly after fertilizer is applied. It is important that the bales do not dry out during the fertilization process.
Day 10. Apply 1 cup of dolomitic lime across the top of the bale and water well.
Days 11 to 15. Apply 1⁄4 cup of balanced fertilizer to the bale daily and water well. You can use either synthetic fertilizers, including general purpose 10-10-10, or organic fertilizers such as 3-4-4 (Espoma Garden Tone). Balanced fertilizers are those that have equal amounts of N-P-K.
After the 2-week conditioning process, you should be able to feel the difference. Put your hand inside the straw bale; it should feel warm and have a crumbly feel. If it does not, the bale may need to continue composting for a few more days. Outside temperatures, humidity, and rainfall will affect how rapidly the bale becomes conditioned; cooler weather will slow the conditioning process.
-
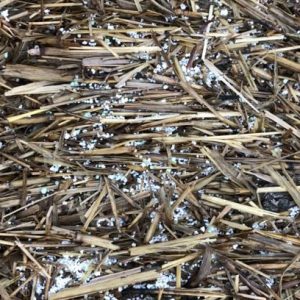
- Figure 2. Scatter the granular fertilizer across the top of the bale and water well. An important part of the composting process involves keeping the bales from drying out.
-
- Figure 3. Transplants work best when it is time to plant in the straw bale.
-
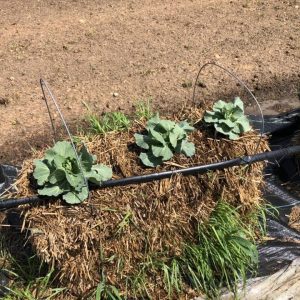
- Figure 4. Straw bales can dry out quickly in the dry summer. Be sure to put them near a watering hose or use supplemental irrigation.
Choose, Plant, and Maintain Your Vegetables
Some plants are better suited than others for straw bale gardening. Crops such as corn, watermelon, cantaloupe, pumpkins, or okra are better suited for in-ground gardens than straw bales. Determinate tomatoes or dwarf container tomato varieties will be easier to stake than indeterminate tomatoes that keep growing larger through the season. Look for dwarf or bush varieties of your favorite vegetables and consider adding trellises, which will use the vertical space to the best advantage. (See table 1 for suggestions on the number of plants you should plant per bale.)
Table 1. Suggested Plants per Bale
| Plant | Number Per Bale |
|---|---|
| Tomatoes | 2 |
| Peppers | 3 |
| Squash | 2 |
| Zucchini | 2 |
| Broccoli | 3 |
| Cabbage | 3 |
| Head lettuce | 3 |
| Leaf lettuce | 9 |
| Cauliflower | 3 |
| Bush beans | 9 |
| Eggplant | 2 |
| Leafy Greens: Collard Turnip | 6 |
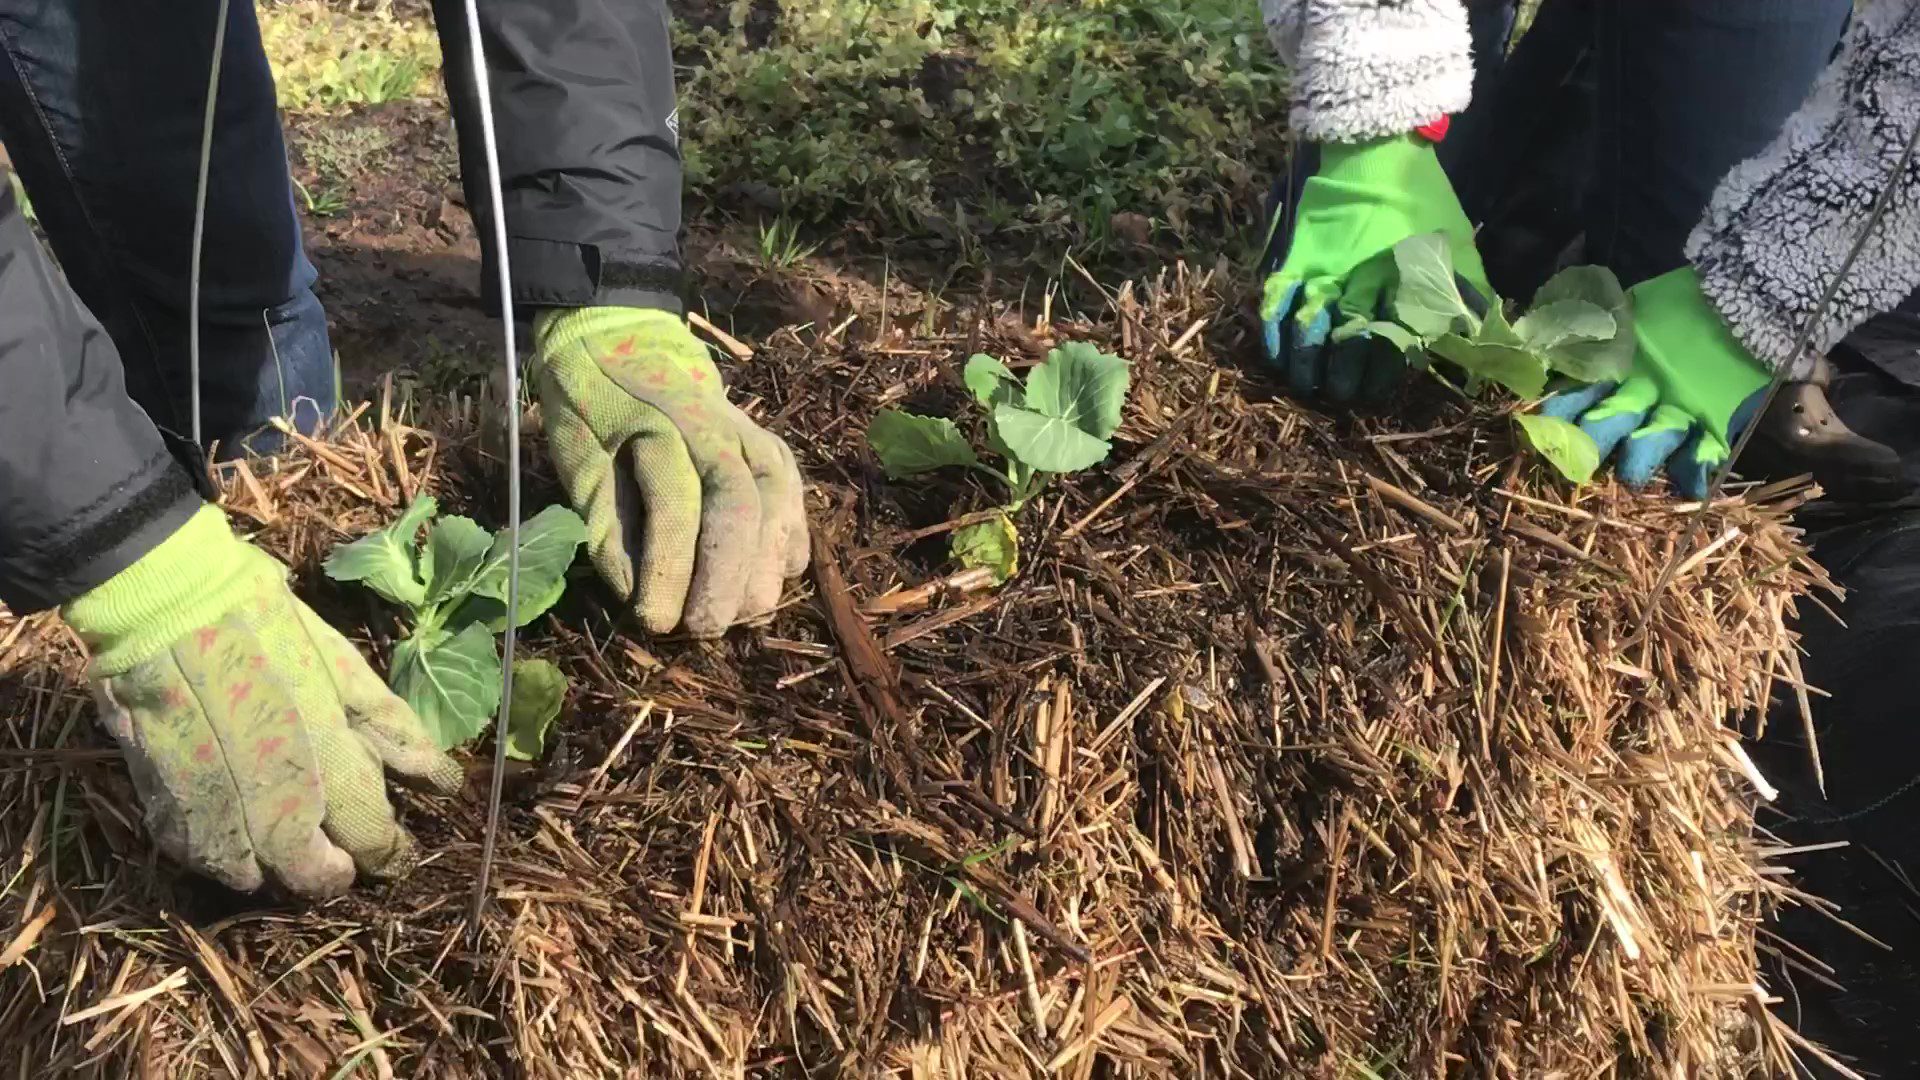
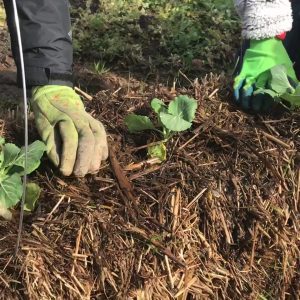
When your bale is ready to plant, transplants are your best choice (figure 3). Dig a hole with a trowel and insert the transplant, making sure to backfill around the plant with hay or soil to fill in any gaps.
Germinating seedlings in the bale is more difficult but can be done. Dig a hole and fill it with potting soil then plant a few seeds into the soil. Well-composted bales may need no additional potting soil.
Throughout the growing season, treat the straw bale garden as you would a container or raised bed garden. Use an all-purpose liquid or granular vegetable fertilizer as directed on the label to provide adequate nutrients during the growing season.
Straw bales dry out quickly, so they will need regular watering. Letting your bales dry out will decrease your harvest. Soaker hoses or drip irrigation can be laid across the top for even watering (figure 4).
It is not uncommon to get two growing seasons from one straw bale. For example, if lettuce is planted in the cool season, you can follow with peppers or squash in the summer. The straw bale will be more composted but still plantable.
The great thing about straw bale gardening is that the bales are recyclable. Once they are no longer plantable, they can be added as mulch to existing garden beds, added to a compost pile, or added to a raised bed as organic matter.
 Dani Carroll, Regional Extension Agent, Home Grounds, Gardens, and Home Pests, Auburn University
New September 2021, Straw Bale Gardening, ANR-2792