Landscaping
Rediscover the camellia as a cherished evergreen shrub both beautiful and rugged. Learn about the camellia’s ideal growing environment, how to plant and care for it, and how to solve common pest problems. Illustrated instructions for propagation and varieties are provided for the beginning grower.
Origin and History
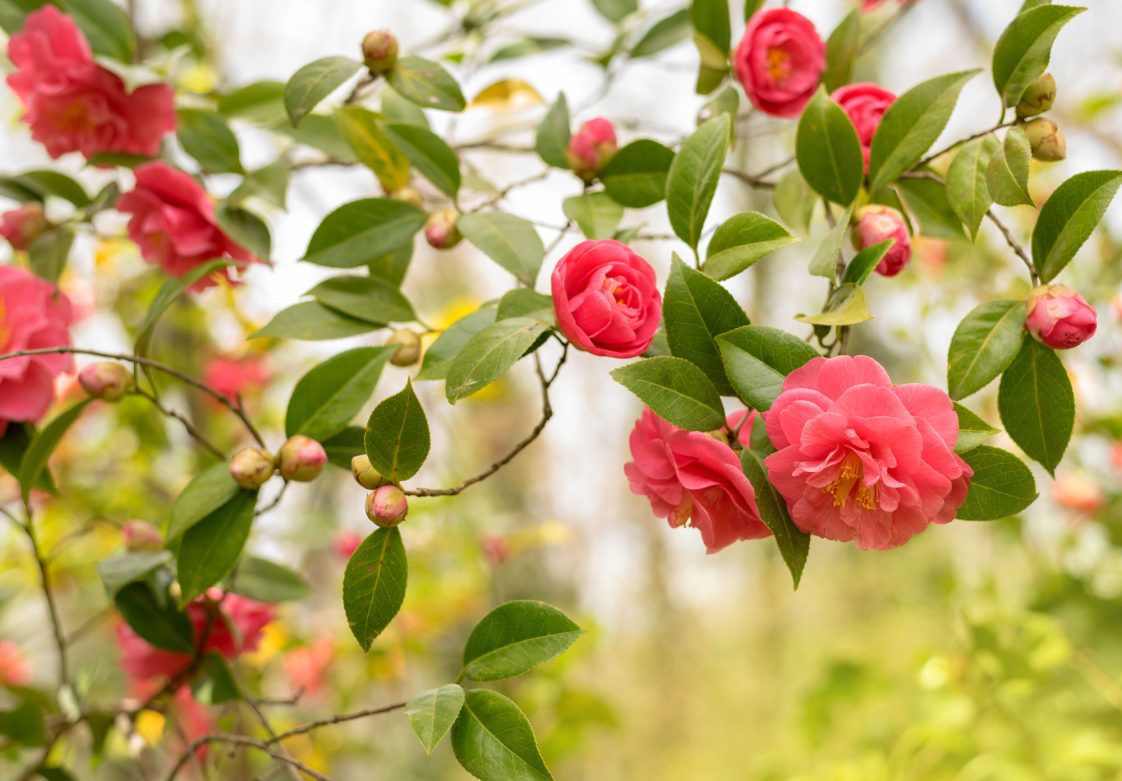
Today’s gardeners find the camellia to be an easy-to-grow evergreen flowering shrub with many uses, incredible ruggedness, and great beauty. With the availability of more flower forms, hybrids, seedlings, and hardy species, along with improved cultural techniques and devices, the outdoor growing areas of the American camellia belt extend farther north each year. Even in the coldest regions, the camellia has become a fixture in the home greenhouse.
-
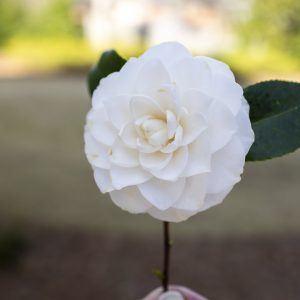
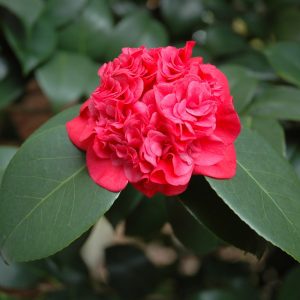
- ‘Nuccio’s Gem’
-
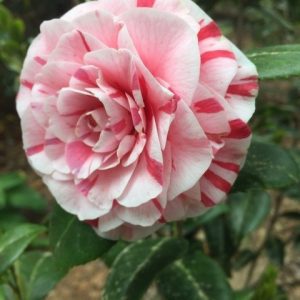
- ‘Pebble Hill Peppermint’
-
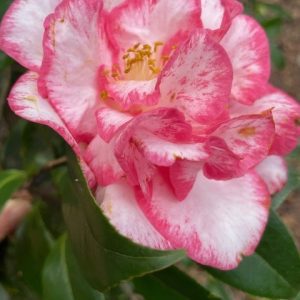
- ‘Betty Sheffield Supreme’
-
- ‘Professor Sargent’
The name camellia (pronounced as either ca-mee-lia or ca-mell-ia) was given to the genus by Swedish botanist Carl Linnaeus, developer of the binomial system of nomenclature used to classify plants. The natural home of the camellia is an area encompassing Southeast Asia, China, Japan, and various islands and countries extending from Vietnam to Burma.
More than 200 species of camellias have been identified, with most of them distributed throughout southern China. The most economically
important species of the genus is Camellia sinensis, the common tea plant. The most widely grown ornamental species is Camellia japonica. And another widely grown species is Camellia sasanqua. In addition, more than 20,000 varieties or cultivars of various species and hybrids have been described worldwide, grown largely by camellia hobbyists. The diversity of flower colors, shapes, and bloom sizes is remarkable. Seedlings of crosses with Camellia reticulata and other species have produced extensive variations in flower and leaf sizes and growth habits.
Read More
To read the full version of this publication, download a PDF of The Culture of Camellias: The State Flower of Alabama, ANR-0202.
The Alabama Cooperative Extension System (Alabama A&M University and Auburn University) is an equal opportunity educator, employer, and provider. If you need a reasonable accommodation or language access services, contact Kerry Smith at smithkp@aces.edu.
 Revised by Kerry Smith, Extension Horticulturist, Auburn University. Originally authored or revised by J. David Williams, Extension Horticulturist, Associate Professor, Horticulture; Urban Diener, Professor Emeritus, Entomology and Plant Pathology; Ron Shumack and Raymond I. Self, former Extension Horticulturists; Ken Tilt, Extension Horticulturist, Professor, Horticulture; Pat Cobb, former Extension Entomologist and Professor Emerita; Austin Hagan, Extension Plant Pathologist, Professor, Entomology and Plant Pathology; J. Raymond Kessler, Extension Horticulturist, Professor, Horticulture; and Charles Mitchell, Professor Emeritus, Crop, Soil, and Environmental Sciences.
Revised October 2024, The Culture of Camellias: The State Flower of Alabama, ANR-0202