Disaster
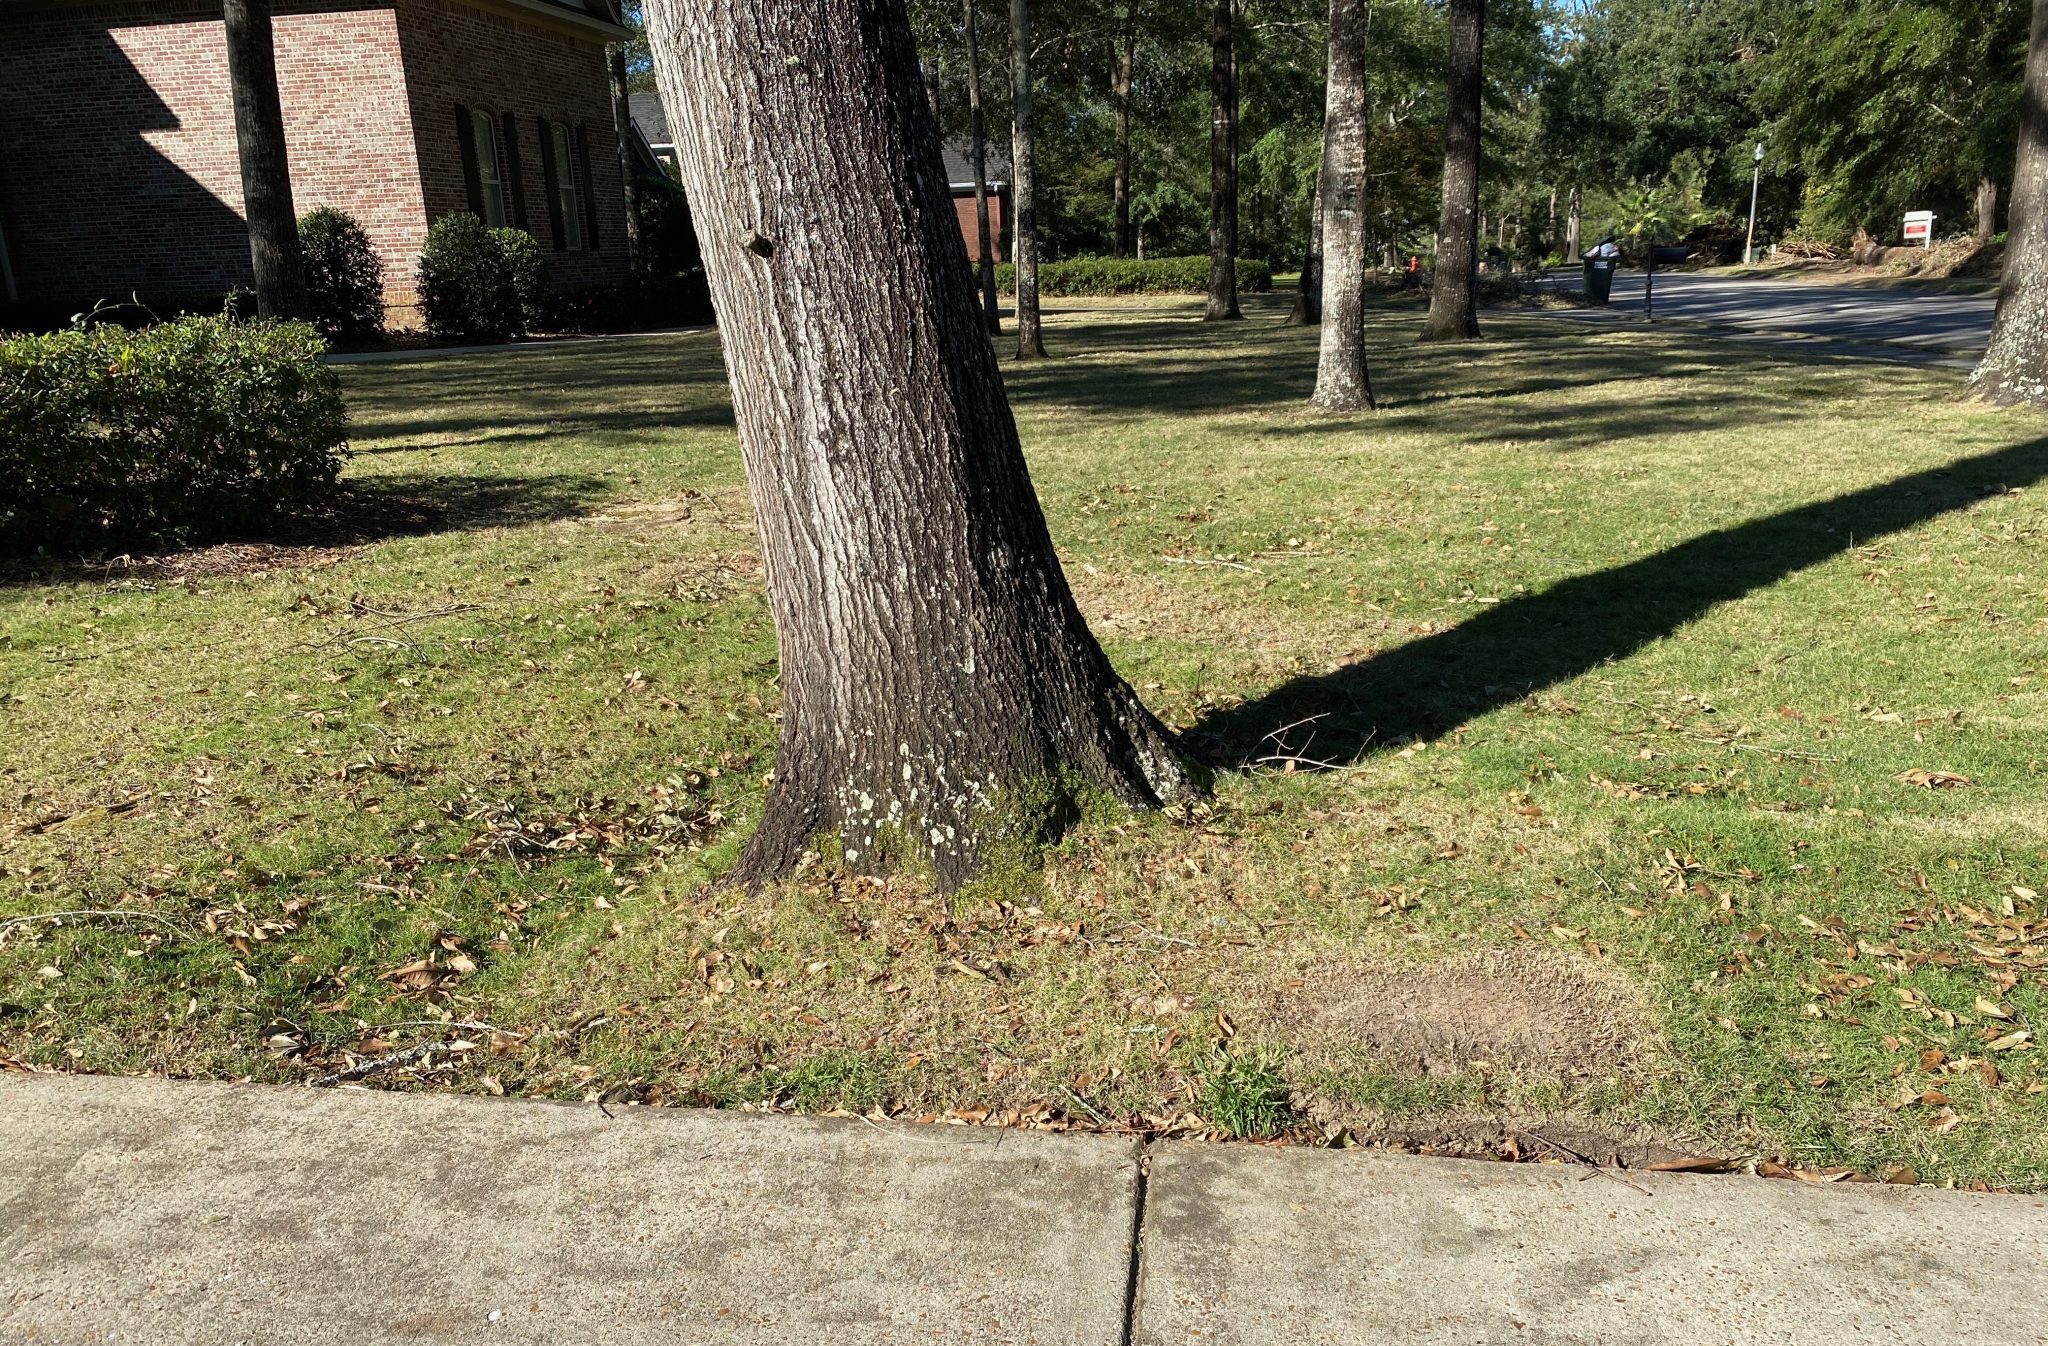
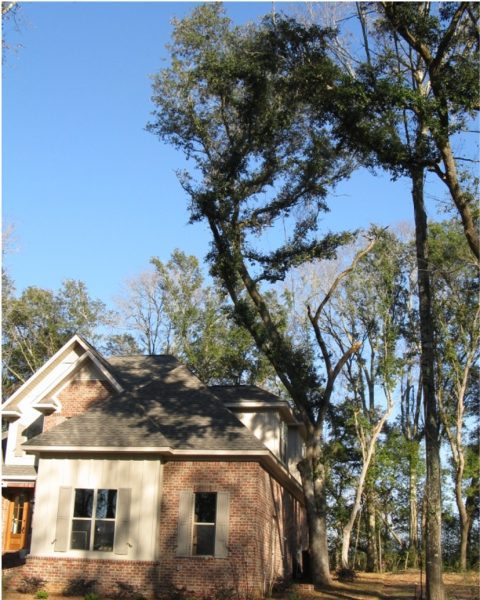
Figure 1. Targets can include homes, people, and cars.
This is the second in the Restoring Storm-Ravaged Trees series. Learn how to determine the safety of your trees.
The first step toward safer trees is to take responsibility. Urban trees are like any other valuable asset. Better management increases the returns and minimizes the risks. That means being proactive throughout the life of your tree or at least as long as you have ownership.
Be thorough when examining a tree for safety. Remember, you are observing the tree for unsafe symptoms. Don’t make snap judgments. Take your time. Try to become familiar with the tree. Stand back and look at it from different angles. The process should be simple but complete and can be systematically repeated with other trees.
There are three simple rules for having safer trees— inspecting systematically, treating problems quickly, and removing a tree when its risks outweigh its value. The following section will introduce readers to the concepts, tools, and defects to consider when evaluating trees for safety in your landscape.
Tip: Large trees should be inspected once a year or after every major storm.
Helpful Tools
It’s hard to inspect a tree without the proper tools. Fortunately, everything a homeowner needs is easy to find. Many useful items can be found around the house or be purchased at a low cost.
- A trowel is a handy tool for investigating around roots and for prying away loose bark.
- Binoculars make it easy to view elevated portions of the tree.
- A rubber mallet is a nonintrusive way to sound trees for cavities or decayed wood.
- A yardstick can help probe cavities or cracks.
- A camera can be used to document damage.
- A note pad is handy for recording information as trees are evaluated.
Keep a record of your findings as you examine each tree for safety. Jot down observations in a note pad and take pictures with a camera. It’s helpful to document declining trees.
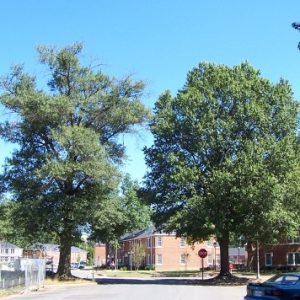
Step 1: Are There Targets?
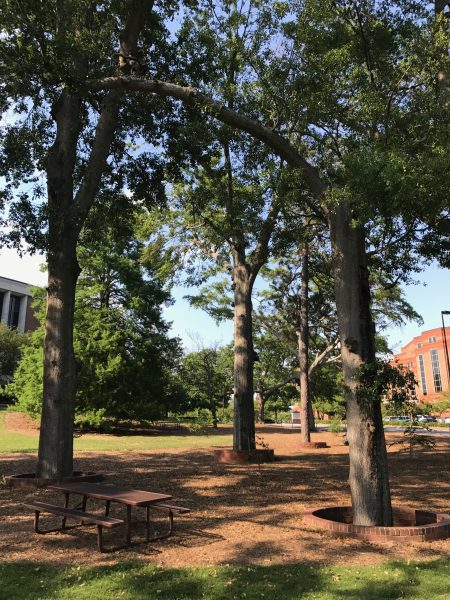
Figure 2. Can you move the target?
The first step to tree risk assessment is to evaluate potential targets that a tree or tree part could strike. Targets can include houses, fences, cars, or people. Target evaluations can be as simple as a home that is under a tree of concern. The home is a fixed object that does not move and is always present if the tree fails. Cars and people are far more difficult to evaluate. It is important to consider the occupancy rate of the area within the fall zone of the tree. If it’s a tree in a seldom visited portion of the backyard, the probability is remote that a person will be under the tree if it fails.
Following significant storm events, there can be an overwhelming number of damaged trees. Evaluating trees based on potential targets and their occupancy rates is a good way to prioritize which trees need immediate attention and those that can wait for available funds or time.
Consider a large tree in the front yard overhanging a street, driveway, and sidewalk. There are three potential targets: cars on the street, cars parked in the driveway, and pedestrians on the sidewalk. It is important to consider the occupancy rate for each of these targets. Ask yourself these questions: How busy is the street? How many hours of the day are the cars parked under the tree? How often are people using the sidewalk? Sidewalks or streets with frequent traffic will have a higher occupancy rate and, as a result, a higher risk rating than more rural less traveled areas.
Step 2: What Kind of Tree Is It?
The second step in the assessment process is tree identification. Knowing the answer can provide important clues about a tree’s safety because some species are prone to certain defects.
Once you know the species, you can research the tree and learn about specific traits that make it either a desirable or problematic species. Water and laurel oaks (Quercus nigra and Q. laurifolia), for example, are known to be fast growing but also prone to extensive decay and hollowing as they age. Live Oak (Quercus virginiana) and Southern Red Oak (Quercus falcata), by contrast, are slower growing and tend to have less decay and stronger wood as they mature. Table 1 provides basic information about trees and their tolerance to root damage, soil compaction, and decay.
Moving targets can be an easy solution to reduce risk and still preserve valuable trees. For example, moving a picnic table or kids trampoline from under a tree of concern. This will reduce the area’s occupancy rate by not having items attracting people to the area.
Table 1. Tree Tolerance to Decay and Damage
Modified from “A Guide to Preserving Trees in Development Projects,” Penn State Extension, William Elendorf and Ed Gilman’s “Ability to Compartmentalize Decay Tables,” University of Florida. This table is based on a combination of research and opinions from the aforementioned sources.
| Species | Scientific Name | Decay Tolerant (Good Compartmentalizer) | Root Severance | Soil Compaction & Flooding | Hazard Potential Rating |
|---|---|---|---|---|---|
| Arborvitae | Thuja sp. | - | Tolerant | Tolerant | Low |
| Green Ash | Fraxinus pennsylvanica | Good | Tolerant | Tolerant | Medium |
| White Ash | Fraxinus americana | Fair | Medium | Intermediate | Medium |
| American Basswood | Tilia americana | Fair | Sensitive | Sensitive | High |
| American Beech | Fagus grandifolia | Poor | Sensitive | Sensitive | High |
| River Birch | Betula nigra | Poor | Tolerant | Tolerant | Low |
| Blackgum | Nyssa sylvatica | Fair | Tolerant | Tolerant | Low |
| Boxelder | Acer negundo | Poor | Tolerant | Tolerant | High |
| Catalpa | Catalpa bignonioides | Poor | Intermediate | Tolerant | Medium |
| Eastern Red Ceder | Juniperus virginiana | Good | Tolerant | Sensitive | Low |
| Black Cherry | Prunus serotina | Poor | Intermediate | Sensitive | Low |
| Eastern Cottonwood | Populus deltoides | Poor | Tolerant | Tolerant | High |
| Dogwood | Cornus florida | Fair | Intermediate | Intermediate | Low |
| American Elm | Ulmus americana | Good | Tolerant | Intermediate | Medium |
| Winged Elm | Ulmus alata | Good | Tolerant | Intermediate | Medium |
| Slippery Elm | Ulmus rubra | Good | Tolerant | Intermediate | Medium |
| Ginko | Ginko biloba | Good | Tolerant | Tolerant | Low |
| Hackberry | Celtis occidentalis | Poor | Tolerant | Intermediate | Low |
| Hickory | Carya spp. | Good | Intermediate | Sensitive | Medium |
| American Holly | Ilex opaca | Fair | Tolerant | Tolerant | Low |
| Honeylocust | Gleditsia triacanthos | Good | Tolerant | Tolerant | Medium |
| Black Locust | Robinia pseudoacacia | Good | Tolerant | Tolerant | High |
| Red Maple | Acer rubrum | Poor | Tolerant | Tolerant | Medium |
| Silver Maple | Acer saccharinum | Poor | Intermediate | Intermediate | High |
| Sugar Maple | Acer saccharum | Good | Tolerant | Sensitive | Medium |
| Bur Oak | Quercus macrocarpa | Good | Tolerant | Tolerant | Low |
| Live Oak | Quercus virginiana | Good | Tolerant | Tolerant | Low |
| Laurel Oak | Quercus laurifolia | Poor | Intermediate | Intermediate | High |
| Pin Oak | Quercus palustris | Fair | Sensitive | Tolerant | Low |
| Southern Red Oak | Quercus falcata | Good | Tolerant | Sensitive | Low |
| Shumard Oak | Quercus shumardii | Poor | Tolerant | Tolerant | Low |
| Water Oak | Quercus nigra | Poor | Intermediate | Intermediate | High |
| White Oak | Quercus alba | Poor | Intermediate | Intermediate | High |
| Willow Oak | Quercus phellos | Fair | Intermediate | Intermediate | Low |
| Loblolly Pine | Pinus taeda | Fair | Tolerant | Sensitive | Medium |
| Longleaf Pine | Pinus palustris | Good | Tolerant | Sensitive | Medium |
| Slash Pine | Pinus elliottii | Good | Tolerant | Sensitive | Medium |
| Shortleaf Pine | Pinus echinata | Fair | Tolerant | Sensitive | Medium |
| Redbud | Cercis canadensis | Poor | Intermediate | Intermediate | Low |
| Southern Magnolia | Magnolia grandiflora | Poor | Sensitive | Sensitive | Medium |
| Sweetgum | Liquidambar styraciflua | Fair | Tolerant | Tolerant | Low |
| Sycamore | Plantanus occidentalis | Fair | Tolerant | Tolerant | Low |
| Tulip Tree | Liriodendron tulipifera | Poor | Sensitive | Intermediate | High |
| Black Walnut | Juglans nigra | Good | Sensitive | Intermediate | Medium |
| Black Willow | Salix nigra | Poor | Tolerant | Intermediate | High |
| Weeping Willow | Salix babylonica | Poor | Intermediate | Sensitive | High |
Step 3: Evaluate the Tree for Defects
Once you have identified the tree, it’s time to begin the actual examination. To do this properly, divide your routine into an inspection of three general tree zones. Each of these zones is a distinctive part of the tree.
Tree Inspection Zones:
- Crown—Tree branches and foliage.
- Trunk—Main tree stem between root collar and lowest limb.
- Roots—Belowground part of the tree extending outward as much as one to two times the tree height.
Root Defects
Roots are to a tree what a foundation is to a house. They keep a tree upright and secure. When roots fail, it can be catastrophic to both trees and people alike. That’s why it’s important to make sure that tree roots are sound and functional. There are two basic kinds of root failure. One occurs when the soil loses its ability to hold the root system in place. Waterlogged soils combined with high winds can cause this type of soil failure. Little can be done to identify this condition; however, it is more prevalent in trees with overly shallow roots. Shallow roots can be caused by compacted soils, shallow soils, or over-irrigation during the life of the tree.
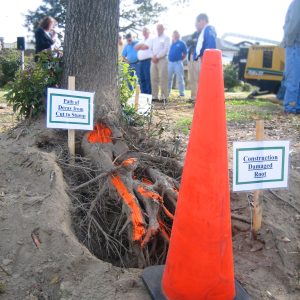
The second type of root failure occurs when roots are severed, decayed, or otherwise damaged. These types of defects are more identifiable and preventable. To check for root failure, look for signs where large roots have died, are decayed, have been cut or broken, or are restricted from normal growth.
Symptom 1: Cut Roots
A tree’s weight is translated down the trunk of the tree and into the large structural roots called the root plate. This supports the tree from both vertical (gravity) and horizontal forces (wind). To better visualize the load- bearing structure of trees, imagine a wine glass sitting on a dinner plate (figure 3). In this analogy, the glass’s stem is the trunk and the base is the structural root plate providing stability. The dinner plate, the rest of the tree’s roots, are there to absorb water and minerals.
Cutting roots inside the root plate is equivalent to removing a portion of the wine glass’s base, making the glass or tree, less stable. While removing any roots inside the critical root zone (figure 4) will affect the tree’s health, removing roots inside the root plate will affect the tree’s stability (table 2). Cutting roots also provides a pathway for decay and disease to further deteriorate tree roots (figure 5).
Click on the images below to see them at full scale.
-

- Figure 3. A tree is like a wine glass sitting on a dinner plate. The top of the glass represents (1) leaves and branches, (2) tree stem, and (3) the structural root plate. A dinner plate (4) represents the feeder root system. Modified from Up by Roots, James Urban.
-
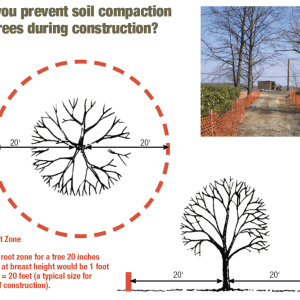
- Figure 4. The critical root zone is derived by measuring the trunk diameter at breast height (DBH), which is measured with a diameter tape at 4.5 feet from the ground, and multiplied against a multiplier. The multiplier ranges from 0.5 to 1.5 feet for every inch in DBH. To determine the correct multiplier, consider the tree’s tolerance to root severance in table 1. A common multiplier for many trees is 1 foot.
-
- Figure 5. Cut roots provide a pathway for tree disease.
Table 2. Extent of Root Plate Based on Tree Diameter at Breast Height*
| Structural Root Plate | DBH (inches) | Structural Root Plate Distance (radius) |
|---|---|---|
| 8″ | 5.5 | |
| 16″ | 8′ | |
| 32″ | 10.5′ | |
| 48″ | 12′ |
Cut roots can be difficult to see, so look for the following:
- Recent construction within the tree’s dripline.
- Trees near new sidewalks or driveways.
- Trees near home foundations.
- Evidence of trenching for buried utilities or landscape irrigation.
Tree health can be a good indicator of damaged or decaying roots. Thinning canopies or dead branches at the tree’s top or branch extremities are good indicators of cut, decaying, or diseased roots (figure 6).
Symptom 2: Root Decay
Root decay weakens roots and over time can lead to whole tree failure. There are multiple types of decay pathogens, and because some are more aggressive than others, it is important to identify them. Signs of root decay include the following:
- Mushrooms or conks. Fresh or old are good indicators.
- Carpenter ants. Ants feed on rotting wood (not live wood).
- Oozing wounds. The smell will be sour and yeasty.
- Loose and missing bark. Don’t be afraid to pry back loose bark to look for rot.
- Open cavities or voids. Probe around the base of the tree, looking for voids.
-
- Figure 6. Note the tree on the left. Trees in decline will have thinning foliage and dead twigs and branches at the edges of the canopy.
-
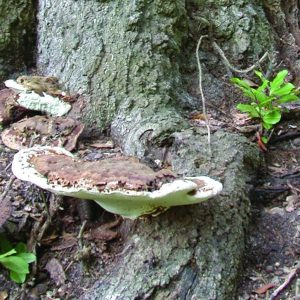
- Figure 7. Look carefully for mushrooms and conks. While not always present, they can be fresh and hidden by mulch or leaves or be old and blackened.
-
- Figure 8. Girdling roots can make unstable trees and lead to decay.
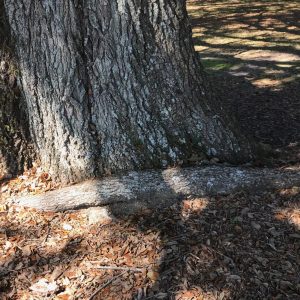
Symptom 3: Girdling Roots
Girdling roots are roots that circle the base of the tree restricting growth to part of the tree’s root plate or the tree’s trunk (figure 8). This can cause trees to develop uneven roots, making them less stable over time. In extreme cases, girdling roots can strangle the tree’s trunk and lead to whole tree death. Decay in the lower trunk or dead roots are a common side effect of girdling roots.
Trunk Defects
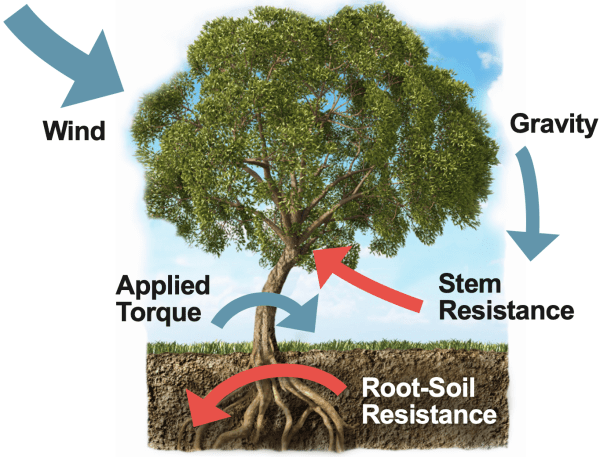
Figure 9. The forces of wind and gravity on tree crowns causes torque to be applied halfway between the crown and the roots. Trees with long spindly trunks are more susceptible to breaking as trunks have smaller diameters when compared to trees with larger lower crowns with torque forces applied closer to the ground.
Trees are anchored to the soil by their roots, and their weight is supported by their trunks. Trees are subject to two main forces—gravity and wind. When the wind blows, the canopy moves and the trunk acts as a lever, translating the forces into the roots. Just as it is important to have a good root system, it is also important to have a trunk that can bear the weight and strain of these bending forces (figure 9). Any defects on the trunk, particularly those halfway between the roots and crown, can weaken trees and lead to failure. In the following section, we will discuss defects to monitor closely.
Symptom 1: Poor Trunk Taper
Significant differences exist between open- and forest- grown trees when considering the effects of wind. Open-grown trees develop larger canopies that extend closer to the ground (more sunlight). These same trees develop thicker trunks with greater taper or change in trunk diameter between their base and top. Forest- grown trees, in contrast, have long straight trunks (less taper) with canopies much higher in the tree (lower branches are shaded out).
When the wind blows, trees will bend halfway between their lowermost branches and the ground (figure 9). Trees with large low canopies will push the bending location to a lower and stronger portion of the trunk with a thicker diameter. If forest trees remain surrounded by other trees, there are few concerns because the other trees buffer the effects of wind). Problems arise, however, when forests are thinned because of development, past storms, or tree removals. These tall and often spindly trees are at greater risk from wind, often breaking halfway between the ground and the canopy. Look for the following:
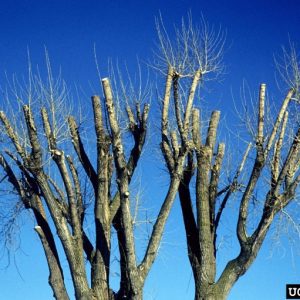
- Recently exposed forest trees with high canopies (figure 10).
- Trees that have had their canopies over- raised by pruning (Figure 11).
- Large pruning cuts (1⁄3 or greater of tree’s diameter) on the trunk, causing pockets of decay that create weak points.
-
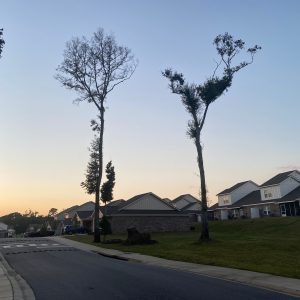
- Figure 10. Recently exposed oak, has a small canopy and long thin trunk.
-
- Figure 11. Note the recent pruning cuts. This tree has had its canopy over-raised.
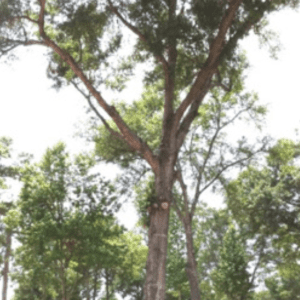
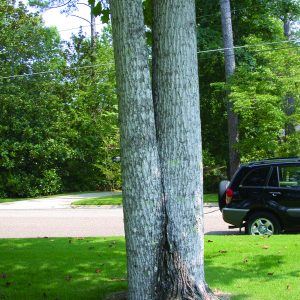
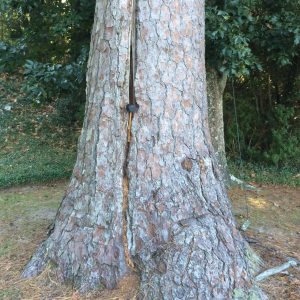
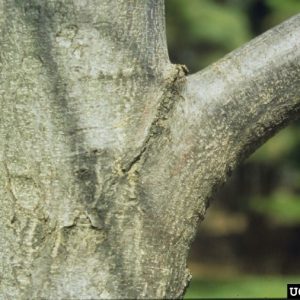
Symptom 2: Multiple Trunks
Failure can occur whenever two or more trunks grow close together to form competing trunks or a forked tree. Competing trunks usually develop weak unions or point of connection that over time can cause one or more of the trunks to separate. The weakest unions will have a narrow V shape, while stronger unions will have a U shape (figures 12 and 13).
Signs that a forked tree is unsafe:
- Stem union is cracked (Figure 14).
- Stem union has decay.
- Stem union has included bark (Figure 12, Figure 13).
Competing trunks with V-shaped unions will often form included bark, a problematic condition where bark from each trunk is in contact within the union. This often leads to trapped moisture and decay and can eventually cause stems or branches to split.
Click on the images below to see them at full scale.
-
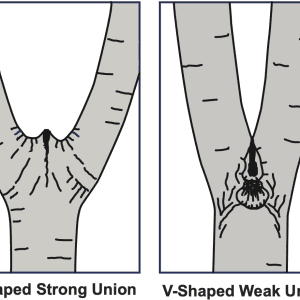
- Figure 12. Codominant stems with a “u” shaped union (left) are stronger than “v” shaped unions which often have included bark.
-
- Figure 13. Codominant stems with included bark is a common cause of failure, especially during storms. Note the more problematic “V” shaped union.
-
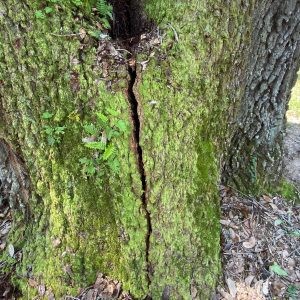
- Figure 14. Note the crack between the two stems.
Symptom 3: Leaning Trees
Figure 15. Mounding on the opposite side of a lean and an indentation on the inside of the lean are indicators of leaning trees and action should be taken immediately.
A leaning tree doesn’t necessarily mean it will fall, but it certainly warrants closer examination. If you have a leaning tree, look for signs of decay and root stability. One indicator of a critical root defect is soil mounding on the opposite side of the lean (figure 15). A tree that has recently shifted from its normal vertical position will require immediate action.
Symptom 4: Trunk Cracks
Cracks are splits in the wood. Deep cracks indicate a traumatic separation of wood fibers. Cracks tend to follow the wood grain along the trunk (up and down) or branch. Homeowners should look carefully when searching for signs of a tree crack. If a crack is discovered, try to measure the length and depth of the wound. As a rule, the deeper and longer the crack, the greater the risk of failure.
Signs that a crack needs immediate action:
- Extends deeply or completely through a branch or trunk.
- Is opposite or connected to a decayed area or cavity.
- Has multiple cracks in the same area of the tree.
Cracks are important signs that a tree has failed. Immediate action should be taken.
-
- Figure 16. Cracks normally result from storm events, but may also be caused by a flaw in the tree’s structure.
-
- Figure 17. Conks are a good sign of internal tree decay.
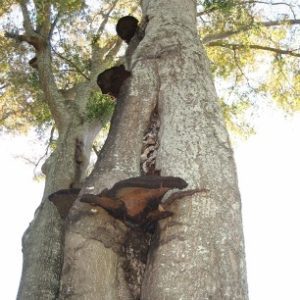
-
- Figure 18. Decay at the junction of large branches is cause for concern. (Photo Credit: Andrew Koeser, International Society of Arboriculture, Bugwood.org)
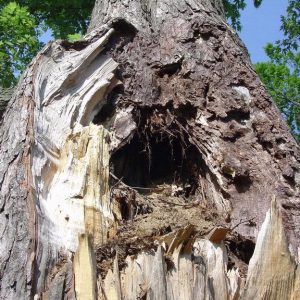
Symptom 5: Cavities and Decay
Most trees have decay. Decay is the breakdown of wood cell walls by fungi. Decay usually results from a past injury to the tree, such as construction damage, storms, insects, parasites, or pruning. Trees attempt to contain decay by forming barrier walls within itself to hamper or resist further spread. Cavities are hollows or holes that are the result of advanced decay where there has been a complete deterioration of wood fibers.
Size and location will determine if a cavity or decay is an unsafe symptom. The larger the size, the greater the risk. The risk is also increased if the cavity or decay is located near or at an important junction, such as at a branch base or near ground level. Homeowners should inspect the trunk, stem, and large branches for signs of decay or cavities.
Signs of decay in trees:
- Mushrooms and conks on the trunk or near the base of the tree (figure 17).
- Loose bark.
- Branch stubs.
- Cavities.
- Carpenter ants or bees.
- Nesting holes.
- Trunk bulges.
- Oozing openings or stains.
Tree Sounding: Thump the tree with a rubber mallet to listen for signs of decay, hollows, and loose bark.
Crown Defects
Symptom 1: Weak Branch Attachment
Homeowners should make every effort to identify branches that are weakly attached to the stem. It doesn’t always take a storm, wind, or other natural events for a weak branch attachment to fail. Sometimes they fail for no apparent reason.
Signs of weak branch attachment:
- Included bark within the union of two branches (see the section on codominant stems).
- Branches that grew from a topping cut (Figure 20 & 21)
- A branch with an abrupt bend.
Indicators of good branch attachment include a bark ridge (upturned ridge between the stem and branch), a branch collar (swollen knuckle at branch-stem junction), and a branch that is not more than half of the diameter of the parent branch (figure 19).
New limbs that sprout from broken or damaged branches are weakly attached. The odds of failure increase as the new limbs gain weight and the parent branch continues to weaken (figure 20).
-
- Figure 19. An upturned ridge between stems or branches indicates a strong union. (Photo credit: Joseph OBrien, USDA Forest Service, Bugwood.org)
-
- Figure 20. The top of this tree was lost in a previous storm. This leads to extensive decay forming multiple cavities causing branches to be poorly attached.
-
- Figure 21. Branches emerging from topic cuts are not well attached and are likely to peel out as they get larger. (Source: https://www. forestryimages.org/browse/detail.cfm?imgnum=5052096)
Symptom 2: Hangers and Suspended Branches
Hangers are limbs that have broken but remain loosely attached to a portion of the tree. These are the easiest to spot as they usually hang vertically to the ground. A suspended branch is a limb that broke off completely, but during the fall was caught by another branch before it could reach the ground. Hangers and suspended branches should not be underestimated, especially if there are targets below. Trees should be inspected carefully, especially after a storm or high winds.
Look carefully, hangers may retain leaves if enough wood is still connected. This can make them hard to see.
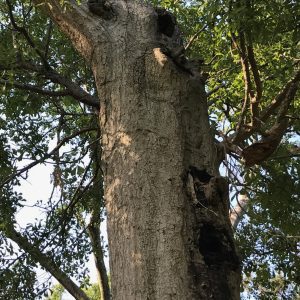
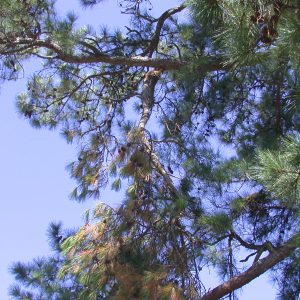
Symptom 3: Deadwood
Deadwood is a fairly easy symptom to recognize. It can be a single dead limb, dieback of branches and branch tips in the crown, or it may be that the entire tree has died (figure 23). All trees have some deadwood. Common sense indicates that the larger the size and amount of deadwood, the greater the safety risk. Therefore, if there is a target, the dead branch or tree should be removed as soon as possible.
-
- Figure 22. Look carefully for hanging branches.
-
- Figure 23. Note the deadwood in the top of the tree.
-
- Figure 24. All trees pose some degree of risk. It is up to the tree’s owner to weigh the benefits and determine how much risk they can accept.
Step 4: Evaluate Your Findings
Once you complete your tree assessment, how do you know what it means? Assessing trees for safety is not an exact science. At best, you can uncover problems that may predispose a tree to an unsafe condition. From there, it is important that further evaluation be made before any action is taken. Key questions to help you evaluate your findings:
- What unsafe tree symptoms did I find?
- What are the targets of concern?
- Can I move the targets to reduce risk?
- Do I need more information?
- What actions should I take?
Getting a Second Opinion
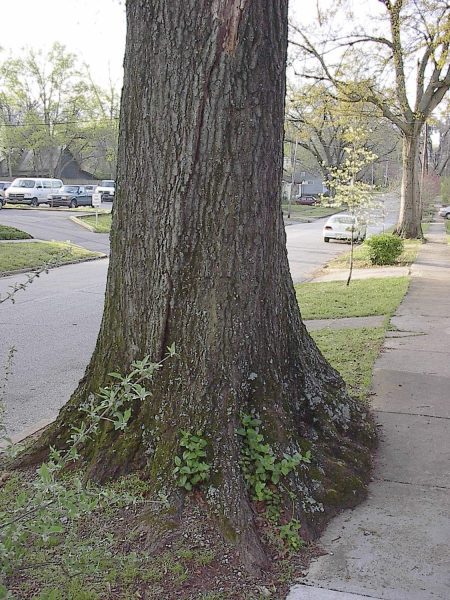
Figure 25. When you aren’t sure if a defect is unsafe, get an expert opinion.
Now that you’ve made your evaluation, the next step is to decide what, if any, treatments are needed. But what if you are uncertain about what you have seen? You should get a qualified second opinion, especially before you take any corrective treatments. A good second opinion can do two things: it can help confirm or correct your original assessment and it can help determine the proper treatment needed. When seeking a second opinion, always choose a person who has the professional experience and knowledge to assess trees for safety. The International Society of Arboriculture has a program that certifies arborists and provides qualifications in tree risk assessment. Certified Arborists are a good resource to further evaluate trees of concern.
If you are having trouble finding someone to provide a second opinion, try visiting the International Society of Arboriculture website (treesaregood.org) to find a certified arborist in your area.
What Problems Can I Fix?
Actually, there aren’t many occasions when a homeowner should do the work needed to correct a tree safety problem. In the few cases when they might, the tree symptom would need to be small, easily handled, and within reach of ground level. The majority of tree safety symptoms are simply too large, too awkward, and too dangerous to be attempted by a homeowner.
Final Thoughts
Having urban trees that are healthy and safe is a lifelong pursuit but well worth the rewards. Not only do you reap the benefits of your tree, but you also have the assurance that it is being managed responsibly. Every decision we make about our urban trees will affect generations both today and in the future. Bottom line, homeowners must make every decision about their trees with safety in mind, starting from the moment a tree is selected and planted.
- Select the right tree for the right place.
- Choose quality trees.
- Plant trees properly.
- Maintain trees for a lifetime.
- Remove trees when the risks outweigh the benefits.
- Start over again.
 Arnold “Beau” Brodbeck, Extension Specialist, Community Forestry and Arboriculture, Auburn University, Jack Rowe, Regional Extension Agent, Forestry, Wildlife, and Natural Resources, Auburn University, and Neil Letson, former State Urban Forestry Coordinator, Alabama Forestry Commission
New January 2022, Restoring Storm-Ravaged Trees: Step-by-Step Guide to Examining Your Tree for Safety, ANR-2796